Important nuances
The hatching of queen bees plays an important role in the development of bees and maintaining the apiary , because the main function of the queen is laying eggs. A beekeeper must be able to correctly organize the output; this is a key skill for him.
In what cases do worker bees breed new queens?
- when the old queen was taken away or she died;
- when preparations for swarming ;
- with a quiet change of the uterus.
On a note ! In this regard, there are different methods of withdrawal - natural, artificial and combined. But first things first.
How to remove a queen bee?
August
In August, honey ready for sale is pumped out. It is important to do this on time so that the weight gain does not begin to decrease and the thieving bees do not become more active. The end of the honey collection should be accompanied by the removal of the extension so that the final pumping of honey coincides with a decrease in the area of the hives.
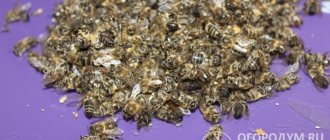
Treatment against varroa is carried out so that the mite does not get into the brood and begin to multiply there. The bees will then start the winter in good, healthy condition, which will help them survive the colder months. The number of queen bees is becoming ever smaller, so it will not be possible to compensate for the number of sick colonies.
Beekeepers carry out an audit: they count how many bee families are left, what their condition is, what are the results of the development of the queen bee (healthy or weak queen bee). Defective honeycombs are reheated. Beekeepers are starting to sell honey at fairs.
Key requirements for a bee colony
The first stage of breeding queens (for sale or for yourself) is the selection of families that will give birth to them. After all, the signs of future offspring will depend precisely on the quality of the parents. The strength and productivity of families are indicators for which young queens bear responsibility. Therefore, families should be headed by high-quality, healthy and strong individuals. Experts say that queens can be bred independently even in a small apiary.
Main selection criteria:
- honey productivity is one of the most important;
- good health, disease resistance;
- cold resistance;
- year-round strength of the bee colony.
Note ! Family preparation should begin a year before the withdrawal takes place. This time is enough to further increase the strength of the bee colony heading for the winter.
In addition, do not forget about some preventive measures that you need to take before wintering:
- give insects food that does not crystallize;
- check the quality of honey produced by the bee colony;
- clean and disinfect the hive, give the bees stimulating nutrition (protection against nosematosis).
In the spring, it is necessary to carry out the final replacement of old overwintered queens with young, newly born individuals. Thanks to this, the family will not be orphaned upon withdrawal. At the beginning of the last spring month, the replacement process should end. If you stimulate the bees with protein and carbohydrate feeding, hatching will produce results earlier.
Expert opinion
Ponomarev Sergey Stepanovich
Beekeeper with 30 years of experience, Candidate of Technical Sciences
It is also advisable to improve living conditions, that is, insulate the hive and take care of protection from the wind. In addition, you can move the house out of its wintering place early.
Having finished replacing old queens and having received sealed brood , begin to form families that in the future will raise young queen larvae. There is an opinion that such families should have at least 2.5 kg of bees, about 11 kg of honey and 4 frames of beebread.
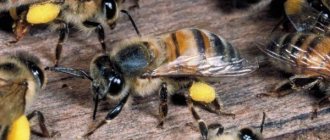
A bee colony without a queen is doomed to death
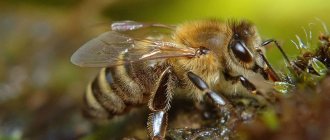
The queen secretes pheromones to be recognized by bees
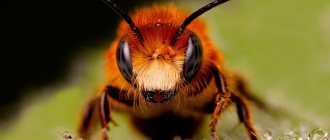
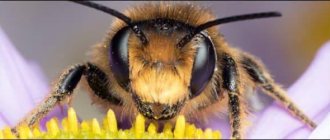
The queen bee is the basis of the bee family
The queen mother is slow and always surrounded by her retinue
March
The beekeeper's calendar for March includes a lot of work. A person must carefully monitor insects, because with the onset of spring they react to climate changes. The expected time frame for the development of families is being thought through.
In early spring, insects are listened to for the last time, and the results of wintering are summed up. It is noted how many colonies have died, and it is predicted how well the bees will survive the next winter. The expected stages of development of the bee colony are determined.
Snow must be removed to prevent accumulation and absorption of moisture. Rotten stakes and covers are replaced with new ones. A plan is being implemented to expand the hive by frames.
How to remove drones?
Drones are removed within the first few days after the hive is exposed from the wintering grounds, since puberty in bees occurs in about a month. To breed drones, select one of the best bee colonies in the apiary.
Narrow the nest in such a colony, leaving the hives busy with breeding in a frame. In this regard, the queen will not be able to fully lay eggs. Next, place the drone comb in the center of the nest.
Interesting fact ! Bees have been producing honey for over 150 million years.
When the insulator is in the center of the nest, place the drone comb with the queen in it. After 4 days, the queen will lay eggs, you move the insulator to the family’s nest and install a new comb . Every day, feed the colony in which the drones are hatching with honey or sugar syrup .
September
The quality (degree of crystallization) of the collected honey is assessed. Unnecessary frames and defective honeycombs are eliminated. More than half of the frame should be filled with honey. Then these reserves will last throughout the winter and families will not die. The preparation of frames for the honeycombs begins. This is a long process: first they are sorted, then cleaned and packaged.
Natural hatching of the queen bee
At a certain point, the family, succumbing to instinct, reproduces and lays queen cells for further breeding of queens. The bowls are laid by insects during the swarming period, in which the queens lay eggs, from which new queens subsequently develop.
During swarming, the beekeeper receives well-developed and healthy young queens without any special costs. The disadvantages of natural inference include the impossibility of planning and spontaneity. Because of this, it is not possible to form layering . Moreover, due to the use of swarming queens alone, high swarming is observed, which is undesirable for the beekeeper.
December
The beekeeper's calendar for December is sparse. During this period, it is best to try to analyze your work:
- identify what beekeeping mistakes were made during the season;
- what should be done to prevent them in the future;
- what are the expected timing of development of bee colonies in the coming year.
Caring for bees in winter is essential. It is worth listening to the hum of the hive in order to immediately pinpoint the causes of bee anxiety. Based on the experience gained, it is worth creating your own breeding calendar based on personal observations.
Bees are special: despite human use and attempts to subjugate and exploit these insects, they remain wild. The results of beekeeping activities depend solely on the skills and abilities of the beekeeper to do his job correctly and competently. The above diagram for the months of the year is approximate in the distribution of work for one season. Experienced beekeepers can deviate from this schedule, adhering to their methods developed over many years.
Artificial hatching of the queen bee
The method is based on the instinct that forces bees to breed queens on the remains of brood when the queen is lost, and consists of several stages:
- rearing barren queens ;
- raising drones, as mentioned above;
- withdrawal of fetal uteruses.
There are different ways to breed queen bees.
The artificial breeding of barren queens differs in that several bee colonies are used here - they are divided into maternal colonies and nurse colonies. The first ones are intended for housing the larvae and hatching the queens; secondly, they (the larvae) are raised.
Let's look at the main methods of hatching by moving eggs/larvae.
Doolittle method
Artificial bowls made of natural wax are prepared in advance, into which the larvae are subsequently transferred. A special stick (used as a template) is dipped in heated wax, which makes it easy to make bowls. This method is popular and is used in cases where many queens are required. It is important that the nurse bee colonies are strong enough and the bee larvae are young enough.
Gusev method
This method allows queens to be hatched by transferring bee eggs. For this, beekeeper Gusev used a special device consisting of 2 bone sticks, with the help of which bowls are prepared for transfer. These bowls are then glued to a frame and sent off to be raised.
Let's proceed to the second stage: bee colonies in which drones are raised are called paternal . The bee colony is used both as a parent and as a parent colony for drone individuals. The main task of the beekeeper is to select a strong bee colony. In rare cases, for this stage it is also necessary to select caregiver families:
- in cases where unique families are taken as paternal ones, from which the maximum number of drones must be obtained;
- with weak spatial isolation.
Important ! The strongest families are selected. The cell area depends on the time of year. When hatching in early spring, strips of honeycomb with drone-type cells During the peak season, it is possible to use full-fledged combs made of drone cells. Remember that drones are raised 10-14 days earlier than queens.
The ability to mate appears approximately 40 days after egg laying. It takes 20 days for the queen to reach puberty. In practice, with the appearance of the first printed brood, drones begin breeding queens. It is recommended to begin breeding drones in the fall, having prepared strong bee colonies in advance.
Facts about honeycomb Nicot
1. The queen lays two types of eggs - unfertilized and fertilized.
2. Drones emerge from unfertilized eggs on the 24th day.
3. From fertilized eggs, depending on the composition of the food with which the bees are fed, the eggs and larvae produce either worker bees (on the 21st day) or queen bees (on the 16th day).
As the egg develops, it tilts to one side and on the third day lies at the bottom of the cell (bowl). A few hours before hatching, the nurse bee larvae place the first significant portion of milk next to the egg, which is 3-4 times the weight of the egg.
During the first days, bees feed all larvae equally with royal jelly. But by the end of the third day of life, the bee larvae begin to feed the larvae of worker bees and drones with a mixture of beebread and honey, if the bee colony develops normally.
If a queen has been lost in the family, or one of the impulses has arisen, then the bees begin to feed some of the eggs (larvae) only with royal jelly in order to ensure the appearance of new queens in the family. Under natural conditions, bees raise, as a rule, 2-6 queens and then the first queen to emerge from the queen cell (often with the help of bees) destroys the rest.
4. Although bees accept significantly fewer eggs than larvae for queen rearing, in recent years (I have not yet found 7-year-old accurate data) scientists have proven by weighing queens and analyzing their egg production that queens that have never received food containing protein components turn out better than those who, for some reason, managed to receive such food.
Application and production of a diaphragm in the Dadan hive
This is where the recommendation in the Nicot system came from, to transfer bowls with eggs that are no more than 24 hours old, in order to IN ADVANCE eliminate the chance of at least one incorrect feeding of future queens. For example, due to bad weather, which will make it difficult or even impossible to carry out the transfer of larvae in time.
5. If one-day-old eggs get into a de-matted colony, then the bees at an earlier stage, realizing the need to hatch new queens, begin to rebuild the queen cells. And such queen cells turn out to be somewhat larger than queen cells that were obtained from late-stage eggs or larvae (you just need to remember point No. 7 of the instructions - see below).
It is easy to calculate that when you transfer even a one-day-old larva, you deprive the bees of the opportunity to begin rebuilding the queen cell three days earlier. And three days out of a total of 16 days is almost 19 percent. Against the background of the short period of development of the queen cell, this percentage is much higher.
Lattice Nicot
Combined withdrawal method
This path includes elements of both artificial and natural (swarm-type families are used). The founder of this method, Doolittle, argued that only if optimal conditions are created for the swarming state of bee colonies or the queen is expelled, excellent quality of queens can be achieved. This option involves breeding the queens without orphaning them.
The method is gaining increasing popularity. Application options for the combined method are given below.
- Selection of high-quality breeding bee colonies and their artificial reduction to a swarm state with the aim of subsequently obtaining swarm queens. It is used in cases where it is necessary to obtain a significant number of queens. The method is close to natural.
- Reproduction of queens according to the swarm type with the movement of bee larvae. In this case, a fairly strong bee colony is taken (weighing 4-6 kg). The colony is partitioned with a Hahnemann grid in order to limit the laying of eggs in the lower body of the hive. It is necessary to constantly place frames with inoculated breeding bee larvae in the top one. The resulting queens are of high quality, which is equivalent to swarm ones. However, the number of larvae accepted is relatively small. To increase the number of queens, you can additionally use a host colony capable of receiving larvae . After this, the larvae can be transferred to a nurse colony, whose queen is isolated in a housing below.
Combined method of breeding queens
What types of calendars are used in beekeeping
One of the most common options is a circular calendar for breeding queen bees. In order to use it, you just need to acquire its image and print it on a printer.
The prepared image must be pasted onto cardboard or similar material.
Such a calendar has a circular shape and consists of two parts: an inner circle (here the days of the queen bee’s development stage are indicated) and an outer ring (the dates of the month are depicted on it).
This is what a queen hatching calendar looks like in photos and videos:
The ring is rotated around the central circle so as to place the moment of the appearance of the larva (the third or fourth day) opposite the date when this happened. Now it will be possible to see what stage of development of the queen bee will occur.
A calendar made in the form of a rectangular table is also used. It shows the dates of the month horizontally, and the stages of work on breeding queens are indicated vertically.
To use it, you need to do the following.
We determine the starting date of egg laying. We mark the column where the corresponding day of the month is indicated. Now we consider the dates of the work stages, which are located in this column.
Queen bee hatching calendar by dates
Other calendar options for hatching queen bees:
Removal of fetal uteruses
On the tenth grafting day, the queen cells are placed in cages, which are then left in the bee nursery. The latter is placed in a foster family. Queen cells can be immediately used for their intended purpose, for example, planted in a bee colony, in layering, etc. The uterus may begin to leave the queen cells on the same day (or after 2-3 days). Infertile queens need to be placed for fertilization . Layers, bee colonies or cores are suitable for this. In industrial conditions, they use cores with a standard or nesting frame, while amateur beekeepers place queens in bee colonies and layers.
Nuclei can also be used at home, but it is recommended to choose standard frames, partitioning the hive and dividing it into parts to obtain a small number of queens.
Hatching queens
Grafting of larvae
Beekeepers call grafting the transfer of a larva from a cell to a prepared bowl. Although this process is not difficult for an experienced beekeeper, it is extremely important for the hatching of the queen. All you need is to have good eyesight, be careful and attentive, and also have a certain skill, which can be achieved in 3-4 weeks if you carry a couple of hundred larvae every day.
The transfer of larvae is carried out using a spatula, which can either be purchased at a beekeeping store or made yourself from aluminum wire with a diameter of up to 2 mm. One end of the wire is bent and made flat (so that it looks like a spatula), after which it is thoroughly sanded, otherwise the larva may be damaged when transferred.
The room in which vaccination is carried out must be clean and bright. The ambient temperature should be 20-25°C, and humidity - from 70%. The latter can be achieved by hanging a damp cloth around the room. If you have a large apiary and are thinking about doing queening, then think about building a well-lit grafting house.
Before vaccination, put the materials and equipment in order:
- well-sharpened knife;
- hot water;
- clean robe;
- spatulas;
- bowls with food on vaccination frames;
- honeycombs with young larvae.
A cell with a honeycomb containing larvae suitable for grafting is cut to 1/2 or 1/3 of the height, which makes it easier to transfer from such a cell to the larvae’s bowl. After which, turning the planks with the bowls up, the grafting frame is placed on the honeycomb. Try to keep the combs with larvae close to the light; lighting is considered sufficient if the bottom on which the larva lies is well lit
With this lighting, it is easier to see the larva floating in the milk and carefully move the spatula under the back, so that both edges of the larva protrude slightly beyond the edges of the spatula. Try to lightly press the tip of the spatula to the bottom of the cell.
This way you will protect the larva from possible damage. As soon as most of the larva is on the tip of the spatula, remove the spatula from the cell and carefully lower it into the bowl (again, pressing the tip of the tool to the bottom) and move it slightly to the side so that, if possible, the larva itself slides off it and sticks to the bottom.
The larva is picked up with a spatula in one go; if you were unable to immediately pick up the larva, then you should leave it alone and move on to the next one. If, when picked up, the larva turns over and leans its back side against the spatula, it is set aside and is not used in grafting in the future (grafting occurs only with the same side as it lay towards the bottom of the cell).
Having finished inoculating the larvae for the selected family, the frame is placed in a portable box and immediately handed over to the family teacher.
Master Class. TOP 3 simple ways to breed queen bees
To remove queens, you can now find all sorts of tools and tools in beekeeping stores - spatulas, metal and plastic. Systems for hatching queens - jenter honeycomb and its analogues. If the beekeeper already has poor eyesight, then there is a special helmet and glasses available. All these are additional expenses that increase the cost of honey for us. For people seriously involved in obtaining honey from bees, these are necessary things; they make the beekeeper’s work easier. They invest money and develop professionally.
Queen bee hatching tools
Expert opinion
Ponomarev Sergey Stepanovich
Beekeeper with 30 years of experience, Candidate of Technical Sciences
But there are beginning beekeepers or amateur beekeepers who keep two, three, five colonies and are not going to develop a large apiary. They keep bees for themselves and their relatives. How should they be? If constantly buying all kinds of additional equipment is it a big expense?
This can all be done much simpler. Hatch the queens without any additional equipment. You don't need to buy anything at all. And we only need bees and nothing else.
Method one. Cutting strips
Let's look at several ways to breed a queen bee for yourself. The simplest ways.
Nucleus
What we need for work:
- box, ramonos or empty case or core . Convenient: take a frame with brood from the desired family, put it in the nucleus, cover it with a canvas and bring it to the room for further work;
- brush - to sweep away bees;
- beekeeping chisel;
- knife;
- beekeeping frame.
Tools: brush knife and chisel
We choose a family from which we will take brood . You need to take from the most productive family. For the “starter” we will need a hive, in which we will place frames for hatching queens.
Note ! From the entire apiary we collect two brood bodies of young bees into one hive. Thus, by the way, we will also carry out anti-swarm measures in the apiary . We put it in one building. They don't have a uterus. After 6 days, we check for the presence of fistulous queen cells ; they need to be picked off. There shouldn't be any open brood there anymore. In such a prepared family we will place frames for hatching queens.
Step 1 . From the family from which we want to make queens, we take a frame with brood. There is no need to choose and search where it is one-day, where it is three-day, and where it is five-day.
Frame with brood
Step 2 . We cut out a strip 2 cm wide along with all the larvae that fall into the strip.
Cut out the strip
Step 3 . The bees themselves will figure out where the one-day/two-day ones are. Take the previously prepared empty frame . There should be wax on it. If there is no wax, you need to apply it in advance.
There should be wax on the frame
Step 4 . We heat and melt the wax with a gas burner. Glue our strip to the bar.
Glue our strip to the bar
Step 5 . We place the frame in the hive in which we removed the queen cells. Then the bees will figure it out themselves and fix everything. They will select the larvae they need by age and pull the queen cells. Later, when they are built and sealed, these queen cells need to be covered with cages. This is the fastest way to hatch queens without transferring the larvae.
Method two. Pruning
We cut a strip out of the honeycomb and place the trimmed frame in the same hive. The bees will draw the queen cells on the larvae they need. That's it, we no longer interfere in this process.
Trimmed the honeycomb from below
In this way, you can do it on the frames of any structure, at least 230, at least 300, whatever is convenient for you. These are the most basic methods: you don’t need to think of anything, you don’t need to rack your brains, you don’t need to strain your eyes, and you don’t need any additional equipment.
Method three. Breeding queens for the lazy
And it’s very simple - the third method is for the lazy. From a hive with a strong family from which we want to get queens, we take a frame with eggs and brood and put it in the starter. The bees will build fistulous queen cells. This is if you don’t want to bother with anything at all. This is how you can breed queen bees for yourself.
Poor Family Starter
We put these frames in the hive and forget about them for 6 days. After 5-6 days you need to check that the bees have rebuilt and what they are doing there.
On a note ! That's the whole process of breeding queens. Unless you are breeding queens for sale, forget about this complicated terminology: starter, mother colony, larval transfer, etc. Cut out the mixed-age brood, place the frame in the hive and your job is done.
July
During this period of work, it is especially important for the beekeeper to ensure that there is enough space for storing nectar. If necessary, it should be expanded. The wax glands of insects work most efficiently, so it is important to provide approximately 2 frames of wax with each pumping (in some cases you can give 1). Then wax loss will be eliminated, and young bees will not be engaged in large construction projects instead of collecting honey.
Mature honey is pumped out. This will prevent it from fermenting and souring. Half of the frame should always remain filled. The summer is being closely monitored. In case of good honey collection, swarming bees begin to hum evenly, muffled throughout the day.
Basic conditions for breeding queens
To effectively breed queens at home, you need to follow certain rules and create the necessary conditions for insects.
- If you want a good queen for breeding, buy her only from reputable beekeepers or well-established breeding apiaries.
- Before breeding, the queen should be given a week to rest, separating her from active bees. After resting, the queen can produce larger eggs.
- In queen cells placed on grafting frames, it is necessary to maintain a temperature of 32°C and air humidity of at least 75-90%. To remove the queens, use an aerothermostat.
- queen cells evenly among different bee colonies to grow and fill them with royal jelly. This rearing process is recommended to be carried out in half of the hives, which will then be layered.
February
The month of February is characterized by frequent temperature changes. It shouldn't go up/down too much. Caring for bees in winter is especially important. For ventilation, you need to bring pre-prepared frozen 20-50 five-liter plastic bottles into the room with the hive and place them on the floor.
Ice will attract heat if spring starts early. Every week in February you need to check the condition of the insects inside the hive.
Nature has provided for everything
Under natural conditions, the replacement of the uterus occurs by swarming or through a quiet change, in emergency cases in case of unexpected loss by hatching fistulas on the existing brood. In these cases, the bees themselves desire a new queen and take all actions to achieve this goal. However, even here the influence of any unfavorable conditions, for example, bad weather with the cessation of bribes or increased nectar secretion, can affect the actions of the bees - the quiet shift queen cells are destroyed until better times or all swarms are removed and the bee colony switches to bribes. Even if in nature there is such a phenomenon that a bee colony that has begun hatching a queen does not complete this task, destroying both the queen cells and the queens that have already emerged, then the intervention of the beekeeper in the process of the life of the family, especially at moments when it is not ready to replace it, more can lead to unsuccessful replanting and loss of the given uterus. Failures with replanting queens are due to the fact that the beekeeper does not think about the community that has developed in the hive where he wants to make a replacement. The specific smell of the hive, each bee colony has its own. The fact that the uterus is the main one in this range of smells is undoubtedly. The queen is very attractive to bees. This is one of the strong bonds in a bee family. The uterine substance prevents the emergence of a new uterus and inhibits the development of ovaries in worker bees. Under the influence of the queen, bees build honeycombs and raise drones, protect the nest, and actively work on honey collection. If the bees do not receive enough queen matter, they have a desire to build bowls and prepare for a change, and if there is a sudden loss, after 5-6 hours they immediately begin to hatch another queen. Therefore, when replacing the queen, the time between selection and replanting of a new one should be 2-3 hours, when the bees have already realized that there is no queen, but have not yet had time to lay their queen cells. The odors of drones can also affect the behavioral character of bees. It has been noticed that crossbred bees are more aggressive towards the queen being placed. Due to the heterogeneity of bees, that is, born from drones of different breeds, groups of bees that have a smell characteristic of their paternal origin can form in the nest. It is possible that such dissociation may cause unpredictable behavior of bees when requeening.
The hive and its inhabitants are saturated with all the introduced and produced odors. Do not forget that even in nearby hives there will not be the same smelling nectar and pollen. The food smell, as a unifying smell, can be used when connecting a layer with a young queen to a deuterated bee colony, if you first give the same aromatic feeding. Feeding connections are so significant that there is an opinion about the transfer of heredity through the food given by nurse bees to the larvae. New bees born from the queen take on the characteristic features of the workers who fed them. And in the same way, bees that have come under the strong influence of the queen take on her traits. Here it is worth saying that when adding a queen to bees of a different breed, there is always a danger that the bees will accept the queen, let her work and begin to exchange her for their own. Here you need to make a weak layer that will only develop, clinging to life, so that there is no choice. The lack of food leads the bees into a state of oblivion, when life barely glimmers. Beekeepers take advantage of this by starving the bees for any action. If you look deeper, the behavior of members of a bee colony and the relationships between them are determined by a signaling system - pheromones, chemicals secreted by special glands. Bees have a large number of receptors located, one might say, throughout the entire insect. The ability to capture even a few molecules of a substance is very high. Pheromones transmit information and cause a certain reaction, but vice versa, the action of a bee colony or impact on it can cause a pheromone signal and a certain response. The release of pheromones may depend on the age of the insect, its physiological state and environmental conditions.
Should accompanying bees be left in the cage when placing it in the hive?
The escort must be removed; other people's bees may be perceived as thieves and the queen along with them is in danger. If the queen is in isolation, it is advisable that at least 2-3 bees be with her. You can add non-aggressive, recently hatched bees to the queen, and she won’t be so afraid of ending up in a foreign country. There are often cases when, left alone in a cage, the uterus will faint, and if there is no one to support it, it may not come out of this state. The fear that the uterus may show at the moment of its release can greatly influence its reception. A weak morally and physically ruler does not attract his subjects. The success of replanting a queen depends on how little there are odors that cause aggression in the bee colony and how much there is unity, encouraging the formation of a common nest, raising brood, and the supply of food for the continuation of life. When replanting queens, you need to construct your actions in such a way that they contribute to the implementation of peaceful pheromone, sound and motor behavior of bees in relation to the new family member, who is destined to be the most protected, cherished and beloved queen of her community. If the beekeeper can set up the bees’ signaling system to raise offspring by turning off the blockers or distracting them for a while, then the “green” light for the queen is guaranteed. And when it comes into force, eclipses with its light and subjugates many, becomes the main regulator and becomes the center of the bee state, then the beekeeper will only have to receive what he deserves for the fatherland. Tell me, why was such a “philosophy” developed? They would write specifically how to plant it and that’s it. In principle, to drive a car, you don’t need to know how its engine turns and how everything works. If it’s broken, replace the blog and that’s it. But those who want to communicate with the machine, feel its essence, will examine every screw, clean and caress it, bring the “old lady” back to life, and will rejoice at its new appearance. On Earth, for all living things, the continuation of life is manifested in offspring with movement in time. The thought involved in this process leads to success.
Happy replanting!
Possible problems
Beginning beekeepers may encounter various difficulties when breeding queens. Common mistakes include the following:
- Removal without using clean material.
- Impact on honeycombs with larvae or queen cells.
- Crossing of relatives.
- Incorrect microclimate in the hive.
- Lack of control over the milk, which causes it to dry out.
- Performing crossbreeding of different breeds.
Removing queen bees is a rather complex and labor-intensive procedure that requires certain skills from the beekeeper. To achieve good results, you must strictly follow the basic rules and recommendations.