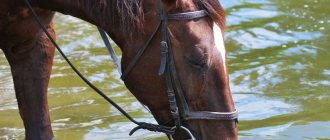
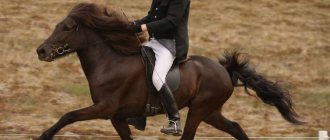
Horseback riding is a rather difficult sport and recreation.
And special attention should be paid to ammunition, since the health of the rider and the horse itself, and sometimes even life, directly depends on its reliability and proper fastening.
Therefore, every rider should be able to saddle a horse correctly. Next, we will look at the main points of competent saddling and pay attention to those moments of this process that are worth paying special attention to.
Horseback riding is a historical heritage worthy of continuation
The first evidence of the domestication of horses is found in Scythian culture. In Ancient Greece and Ancient Rome, the Thracian and Thessalian cavalry were very popular; the need for training in this skill became the reason for the emergence of a riding academy. However, at that time the entire set of knowledge available to us had not yet been formed.
Greek horsemen
The military importance of cavalry in military affairs has constantly changed over the entire period of our civilization; in Rome, horse cavalry was only an auxiliary military force and was not highly qualified. The key problem was the use of bareback horses. As a result, a fighter could not achieve great art of combat without having a sufficiently confident landing, ensured with the help of equipment.
In Europe, horse riding appeared as a result of cultural and economic borrowings from the Persians. Europeans used horses primarily for military purposes. In a fairly short time, horseback riding reached great heights and became a real military art, which over time became privileged, as most aristocrats entered military service.
Requirements for horse riding have changed many times due to changes in the purposes of using horses and, as a consequence, the nature of riding, culture and fashion. Nowadays, this knowledge is cumulative in nature, it is expressed in the areas of professional and amateur equestrian sports and represents separate disciplines designed to obtain professional and amateur skills. We are talking about such areas as dressage, show jumping, horse riding, eventing, racing, and vaulting.
What do you need to know?
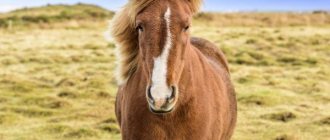
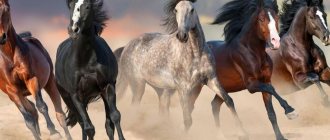
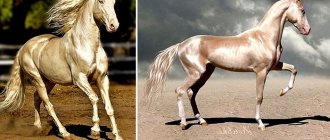
Visually, horses of different breeds differ in color, height, total weight, proportionality of the body and other physiological characteristics.
We should not forget about such an important criterion as the animal’s temperament. The combination of all these characteristics determines suitability or, conversely, unsuitability for a particular type of activity.
Most breeds have a gentle and docile nature. As a rule, these are factory riding horses and light-draft artiodactyls. In other words, born through crossbreeding of different breeds.
You can tame any horse, but representatives of some breeds will require much more time and effort. These are the “hot blood” breeds, for example, purebred English and Arabian horses.
Arabian horse
They are characterized by obstinacy, a sharp, assertive character, sometimes even aggression towards a new, unfamiliar person. Local or aboriginal breeds may be even more intractable, especially those who have not known saddles.
The difficulties of taming such animals are described in detail in fiction. However, the unfriendly nature of horses is rare, and it manifests itself mainly in the absence of proper care.
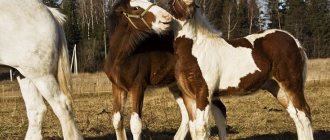
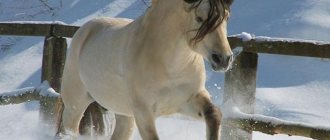
Many breeds are born with an obedient temperament and gentle disposition.
These qualities are often characteristic of most factory riding and light draft breeds, as well as transitional type breeds, that is, those obtained from crossing factory and local breeds. But heavy trucks have the calmest, truly phlegmatic character .
Heavy truck
These good-natured giants were selected specifically for hard everyday work and are best at communicating with humans.
What breed of horse is best for training?
Horseback riding as a culture developed among different peoples in parallel and was divided into two types: the use of horses without prior training and targeted methodological training of the horse, which ultimately facilitated the execution of the rider’s commands.
Getting to know the horse and making emotional contact is an important learning point.
Eastern peoples typically use the first method; they practice riding bareback horses. This is also typical for Russia - on farms, in Cossack settlements, among riders who independently learned to control a horse. It is worth noting that those innate riders who intuitively know how to ride a horse adhere to unspoken rules for controlling the animal’s behavior, seating, and movements while riding.
Civilized European peoples and, as a consequence, the Austrian and German schools are characterized by the use of an artificial method, which has changed over many centuries and has come down to us in an aggregated form. Knowledge represents, in total, military skills, fashion requirements, and aristocratic behavior. At the same time, it cannot be said that the established rules are correct, indisputable and unambiguous. In equestrianism, everything is determined by the practice and purpose for which riding is used.
In our time, trainers also use elements or a complete methodology of artificial riding. Due to the serious training of the horse, when a beginner sits in the saddle, he can feel completely safe.
For this reason, the choice of horse breed does not matter. All training horses are trained in classical riding and calmly obey the instructor. As a rule, if basic precautions are taken during training, it is impossible to fall, and the horse behaves calmly and comfortably for the rider.
Important points
The procedure for saddling a horse has 3 main stages:
- horse preparation;
- placing a saddle on the horse's back;
- putting on the bridle.
These are the most important stages when riding a horse. Saddling a horse is not difficult, it is important to follow all the rules for a good and safe ride. To ride a horse, the first thing you need to do is get to know him. A person must find a common language with a horse and correctly position him towards himself. The horse should feel that it is not in danger. It will be especially effective if the rider talks to the pet in a calm and gentle voice. But you definitely don’t need to saddle a horse while it’s sleeping, as it will lose confidence.
You need to find a common language with the horse and win him over
The next step is to inspect the animal for damage and injury. You should pay attention to even the smallest scratches, especially on the stomach and sides. Each leg of the horse is carefully examined, since it is in this area that the belts and girths are installed. It is the girth that can rub under the animal’s feet during the trip.
When minor damage is found, they should be treated with special antibacterial agents. Also, such wounds can bring severe discomfort and pain to the pet, so it is advisable to postpone the walk and pay attention to the health of the horse.
How to saddle correctly?
Saddling a horse is divided into several main stages: cleaning, putting on the bridle, securing the saddle. But before you start equipping your horse, you need to communicate with it and win it over. We will talk about each of the stages in more detail.
The first thing any rider should do before mounting a horse is to inspect the animal. Any swelling, abrasions on the sides and withers, wounds must be examined and treated with a disinfectant.
In addition, if these formations prevent the horse from feeling comfortable, then riding with the saddle should be discontinued until the wounds have healed. You also need to examine the horse’s belly, the area under the front legs (the place where the girth will go). If you notice any abrasions there, you will also have to cancel the workout. After this, you can clean the animal.
Bridle
Next, you need to carefully put on the bridle. Be very careful, do not pull on the bridle, do not jerk the horse, you can injure his mouth with the metal bit. Stand next to the animal, always on the left side. Place a rein around the animal's neck. With your right hand, grab the horse's head at a level above the nose, but below the eyes and smoothly pull it down a little. Thread the capsule (a special wide ring under which the belts with iron are located). Then quickly but very carefully introduce the iron into the animal's mouth.
If a cunning horse refuses to open its mouth to take the iron, then there is no need to knock on its teeth with a metal bit. Believe me, this will not improve your pet’s mood; it is better to press the fingers of your left, free hand onto the horse’s mouth at the very base. There is a soft part of the gums there, and with enough pressure the horse will open his mouth and take a bit or other type of bit.
After this, thread the animal’s ears through the bridle, making sure that the forehead strap does not come out too high on the horse’s forehead and does not hang low. In addition, it is worth putting bangs into the forehead, if your pet has them. This will allow the animal to get rid of excess tickling. Finally, fasten the chin strap.
Now that you have successfully handled the bridle, you can exhale a little, gain confidence and strength (which you still need to tighten the girth and successfully ride) and begin to secure the saddle.
Saddle
First of all, place a saddle pad on the horse's back - a special blanket that prevents the horse's back from abrading. Make sure that the cloth completely covers the withers, and the lower edge of the saddle pad is at the shoulder.
The saddle pad must be placed so that the loops and fastenings are directed towards the animal’s head. On top you need to put a shock absorber (a special gel pad designed to better distribute the weight over the animal’s back) and a sweat pad. They should be positioned in the same direction as the saddle pad.
It's time to get on with the saddle. Take it in your hands by unrolling the girth and placing it on the seat. Place the saddle on the horse's back so that the rear edge is at the very end of the shock absorber. Thread the girth through the loops of the saddle pad and wrap the fasteners around the straps. Then comes the fun part of saddle riding - attaching the girth. Having passed the girth under the horse's chest, begin to fasten it to the girth on the left side. Remember that there should be two fingers between the girth itself and the skin of the animal.
From the video “All about management” you will learn a lot of useful information.
In fact, tightening the girth is very difficult. Especially for a beginner, on a cunning and voracious horse. These extremely intelligent animals have the unique property of taking in air, significantly expanding in volume. As a result, after the rider enters the arena with the happy intention of jumping into the saddle and starting training, he will be severely disappointed. During the journey from the stable to the arena, the animal is “deflated”, the girth is weakened, and the unlucky rider dives face-first into the sand when jumping. Therefore, when you go out onto the field, you should definitely double-check the girth and tighten it if necessary.
Among other things, elements such as dowels, boots, bandages, martingale or crutches can be used in the saddle of a horse. Remember that a saddled horse should not be left unattended.
Preparing the animal
Before you saddle a horse, perform several actions:
- First, get acquainted with the animal . They talk, treat, pet. It is much more difficult to saddle an excited horse. When riding, man and horse must become one team. The success of the walk and its safety for both depends on mutual understanding.
- Before being saddled, the horse is examined . There should be no serious damage - wounds, tumors, large lymph nodes. This is especially true for areas in contact with the saddle and bridle, which will rub when riding. If an animal has serious injuries, it behaves nervously during a walk. This is a dangerous situation and you should contact your veterinarian. Small wounds are treated with antiseptics. It is advisable to measure body temperature. Having assessed the condition of the horse, it is saddled or the riding is postponed.
- If everything is fine, clean the wool . Debris and matted hairs lead to irritation, chafing, and can become a breeding ground for infections. Take special scrapers or brushes. Start on the left, go from the head to the back of the body. Then the feet are cleaned. Finish cleaning with the mane and tail. Here you will need metal or plastic combs.
- Check the hooves by lifting each leg. Pebbles sometimes get stuck in hooves and horseshoes, causing calluses.
- They saddle only after checking the harness . Check the integrity and serviceability of all belts, fasteners and other parts. If necessary, repair or replace. Dirt or scuffs on the harness are also not allowed. Dirt and sawdust rub on the harness and lead to injury.
Additional parts
Above we described the details that are required when saddling. However, additional parts are also used to make the riding process safer and more comfortable.
Underarms and bibs
This is the name given to belts that prevent the saddle from slipping and moving while riding. The girth must be worn around the neck and attached with one edge to the girth, and the other two to the rings on the saddle. The breastplate goes around the horse's chest and is attached to the girth.
Undertail
The undertail is the strap that secures the saddle under the tail. Its function is to prevent the saddle from moving forward. The undertail is attached to the back of the saddle and extends under the tail.
Horse protection
To prevent injury to the animal, special devices have been developed. Basically they are designed to protect the horse's legs. Such devices include special bandages, boots, bells, etc. Protective equipment should be attached by experienced horse breeders.
Thus, bandages can prevent tendon stretching, but only with proper winding. Boots and bandages must be worn before the saddle.
Stage two: brushing and hoof care
The next preparation step is combing. This allows you to remove debris and give the tail and mane a beautiful appearance. Special combs are used for the mane; particularly tangled areas must be sorted out by hand, being careful not to cause discomfort or pain to the horse. For the tail, manual brushing is recommended, after which you can use very soft brushes.
The next step is proper hoof care. You need to unhook your legs one by one. To do this, a special tool is used, the hard side of which removes large pieces of dirt, and minor accumulations are removed using the second side in the form of a brush. The soft part also treats the most vulnerable areas, which eliminates injuries during cleaning. Actions should be smooth; it is very important to make the procedure pleasant and relaxing, comfortable for the animal.
Getting into the saddle
In order to ride beautifully and safely, you need to properly saddle the horse and sit in the saddle correctly.
Knowledge of how to properly saddle a horse ends with information about proper seating in the saddle. It also consists of several basic rules.
- From the horse's left side, stand at the front of the horse's body.
- Take the reins in your left hand, but do not tighten, otherwise the horse will back away. With your right hand, grab the back edge of the saddle.
- Place your left foot in the stirrup and push your body up and throw your right leg over the saddle. You can additionally help yourself by grabbing the mane with your left hand.
- You need to mount your horse slowly and without sudden jolts. Once in the saddle, place your feet in the stirrups and pick up the reins. The saddled horse is ready to move.
What is the saddle made of?
The saddle has a shape and weight selected experimentally. Every line in the saddle is thought out, and all its elements have a specific function.
A rider sitting on a horse without a saddle puts his weight on the back of the animal. The sit bones get the most damage. Thanks to the saddle, the load can be distributed over the contact area.
The saddle consists of the following elements:
- The bow is the bending part of the frame. Thanks to it, the rider sits in the saddle more confidently and reliably. There are two bows - front / back.
- Seat - it is located below the bow. This is what the rider occupies during the trip.
- Archak or tree is a solid frame consisting of a bow and side benches. Materials of manufacture: laminated wood, plastic, fiberglass. The appearance of the saddle depends on the size and shape of the archak.
- Harness - stirrup straps (they are also called harnesses).
- Stirrups - they are attached to the saddle using a harness and shnellers. They provide a reliable ride. Allow the rider to maneuver by changing the center of gravity.
- Shneller - locks on which the harness is attached.
- Wing - elements made of leather. Designed to cover the buckles that attach the stirrups and girth. The shape of the wings depends on the type of saddle. Dressage wings are equipped with straight and elongated wings, while jumping wings are short and moved slightly forward.
- Saddle cloth - it is placed under the saddles to increase the comfort of the horse. Made of natural material that absorbs horse sweat well.
- Saddle cushion - it is stuffed with wool or synthetics. Prevents the saddle from coming into contact with the animal's spine.
- Girths are straps that go around the horse's body and hold the saddle on its back. Material of manufacture: leather or synthetic.
- Martingales are leather straps that go from the girlfriend to the headband. Necessary to prevent head lifting too high.
The sweatshirts must be periodically taken out and washed so that the dirt that accumulates on them does not injure the animal’s back.
Control methods
To control a horse you use:
- reins;
- legs;
- human body.
These three tools are used to perform various commands in a comprehensive manner. The different demands of a person are served by a certain sequence of actions with the reins, legs and body. The main tool with which a horse is controlled is the reins, left and right. You can draw them on yourself, and in this way the horse will understand that he needs to stop, or release them, indicating to the animal that it can go forward.
When stopping or sending, the reins are used together. When making turns to the left or right, the left or right rein is pulled. The leg is the inner part of a person’s leg from the knee to the foot. These parts are adjacent to the sides of the horse. And when they squeeze the horse’s body, push, press behind the girth or under the girth, he receives a command what action he needs to perform.
Controlling an equid with the help of inclinations of the human body is based on the fact that in this way the rider forces the animal to change its center of gravity. For example, when the body tilts in any direction, the rider signals the beginning of a turn; when the body tilts forward, it indicates the beginning of movement; backward, it indicates a stop or settling.
Ammunition
To properly saddle a horse, you need to understand what the harness consists of. Its main parts include:
- The bit is a special rod that presses on the folds in the corners of the mouth and the tongue. There are rings at the end of the element. The bit is needed for control. A common option is metal or rubber bits.
- A bridle is a set of straps that is placed on the horse's head and controls the bit.
- A halter is used not only to saddle, but also to tie and lead an animal. The set includes a chumbur - a special occasion.
- The saddle is the “heart” of all equipment. The saddle connects the rider to the horse. It is necessary for the convenience and distribution of the weight of the rider. There are many types of saddles, so you need to choose an option based on the purpose of the trip and the skill of the rider.
- Reins - connected to the bit rings. This is the main control, especially for a beginner. The reins are used for turning, moving backwards, and stopping. Most often made of leather.
- A girth is a strap under the animal's belly that secures the saddle. It is fastened with a harness. This is a fastening strap located on both sides of the saddle: under the wings.
- Stirrups - These contain the rider's feet.
Since the domestication of wild horses, many different types of equipment have been invented. In addition to the main parts of ammunition, there are auxiliary ones. Each of them is needed in a specific case. This type of harness is used to create additional comfort and train horses. This includes, for example, linings:
- a special blanket for the saddle - a saddle pad;
- a fur layer between the girth and the belly.
bit
Halter
Bridle
Saddle
Reins
Stirrups
Precautionary measures
When working with a horse, you should adhere to safety measures:
- When riding, wear only closed shoes with heels. The best shoes are boots.
- Do not wear clothing with fluttering parts or loose ends.
- Ride a horse wearing a protective helmet.
- Approach the animal only from the left side, after calling it by name.
- Walk around the equid only from the front. Passing from behind is strictly prohibited.
- Before riding, check the condition of the bridle, saddle, girth, and stirrups.
- The horse should be controlled gently and calmly. Sudden jerks, jolts, and impacts are prohibited.
- Before you saddle a horse, study the technique of behavior in critical situations (if an equid has bolted, reared, kicked, fallen), and also learn how to fall correctly.
About rewards and punishments
The success of good education of an artiodactyl largely depends on its understanding of the good and bad state of things. In this connection, positive qualities in the form of diligence, concentration, and so on must be rewarded. Wayward antics must be stopped in time.
Verbal praise is a great incentive for a horse to behave in a certain way. Particular attention must be paid to your intonation.
All kinds of treats also help correct behavior. The method of extra work is used as punishment. When the animal understands that failure to perform an action results in two more additional ones, it becomes more pliable.
A special manifestation of a horse's capricious behavior is the habit of biting. A gentle slap on the animal's face will help wean him from such behavior.
If you decide to tame a horse, and especially if you are new to this business, then you should remember the rules and features listed in this article, following which you will be able to gain the animal’s trust and achieve the desired result.
Gaits: ways of moving a riding horse
Gaits are types of horse movement, divided into natural and artificial. The simplest and most accessible to study is considered to be the “step”.
Step
When walking, the speed of the horse is 2 m/s. Simultaneously strikes with 2 hooves, while also having two legs in the air. When trotting, the speed develops up to 10 m/s, two impacts of the hooves are also clearly visible, but the legs move “diagonally” crosswise. A special species of trotter was obtained through selection. This breed can trot for a long time without getting tired and without going into a gallop that is uncomfortable for the rider; maximum speed is achieved when moving quickly.
Lynx
Ambling has developed as a natural gait, which develops a higher speed than trotting. Horses usually move either at an amble or at a trot.
Gallop
When galloping, a speed of 70 km/h is reached, three hooves are clearly heard. There are three varieties:
- slow - for circus riding;
- medium - ordinary;
- fast - field.
Several other types of natural gaits may occur:
- kelt (telt) or hoda (very fast step), due to the natural characteristics of Icelandic horses. Almost absent now in European breeds due to targeted selection, it is a sign for culling an individual;
- marcha - found in Brazilian horses, comfortable for the rider;
- djurga - typical for the Karabair breed, speed between trot and walk, very comfortable;
- pas fino (small step);
- shlapak - a medium gait between trot and gallop. Also refers to incorrect gaits; the horse is retrained for traditional types of movement.
A number of artificial gaits are used in horse training:
- passage;
- piaffe;
- Spanish step;
- Spanish lynx;
- gallop on three legs;
- gallop back.
Artificial gaits are used in performances and demonstrations.
Description of the trot as a gait
When moving at a trot, a horse alternates pairs of legs diagonally, this is the so-called alternating two-hoofed leaning. It is important to maintain the correct position; changing the position of the body helps control the pace of the animal’s movement. There are shortened, medium and extended trots. When trotting, breeding trotters can outrun other breeds.
How to trot correctly
The trot is a comfortable medium pace. The horse simultaneously kicks its hooves when the left hind intersects the right front. The gait can be lazy and strong, to very vigorous running.
| Step | Description |
| 1 | Learn the commands (for the horse to stop, advance and turn) and the walk gait. |
| 2 | Let the horse walk after consolidating the skills, achieve a rhythmic, calm pace |
| 3 | Maintaining posture and balance will make the gait easier to perform. |
| 4 | Let the horse trot, encouraging you with your legs and whip. Bounce slightly in the saddle as you ride to help maintain your balance (don't forget the silicone pads). Adjust the speed of movement using the reins and legs |
Typical rider mistakes during the trot
Typical mistakes when performing the trot gait include:
- poor posture and poor horse handling skills;
- a nervous movement that throws the horse off;
- lack of rhythmic movement “up and down” with the horse;
- changing rhythm of the rider's movement;
- during a marching trot, riders often move intensely;
- during the training trot, the rider sits partly on the horse, as if riding on a bench - the correct seating of the rider is very important, since otherwise the rider will shake.
It is important to maintain correct posture
There are several types of lynx, each of which is characterized by its own mistakes. Master exercises “from simple to complex”, moving on to more complex forms of gaits.
Warnings while trotting
There are some precautions to keep in mind when performing the trot:
- the trot is mastered only after learning the walk;
- trotting is usually ridden in pairs, as it is a dangerous type of movement;
- It is not recommended to change intonation when communicating with a horse;
- fast driving may be associated with ambient noise, which often frightens the animal, which can break into a gallop.
It is worth recommending that you learn the trot with an experienced certified instructor and attend classes regularly. In this case, personal achievements in the field of horse riding are guaranteed. After mastering the usual technique, we recommend taking up special types of gaits: Spanish trot and passage.
Self-training
During the first training sessions, students cannot do without the help of an instructor. But after gaining sufficient experience, the student moves on to independent training.
The first few lessons are held in the arena so that the beginner can adapt and feel confident. The instructor observes the rider’s posture, body position in the saddle, and points out control errors. But after 2–3 lessons, the student begins to train himself. Once you feel confident in the saddle, you can ride out of the arena into the open space.
Clothes and uniforms for horse riding
Clothing is part of the rider's equipment. Traditional costumes consist of elastic trousers, leather chaps, a comfortable jacket made of soft fabric, long gloves and a helmet. The style that takes its origins from their equestrian uniforms is called derby. It's great for casual wear.
Helmet
Classic set and types of clothing for riders:
- redingote - a long jacket;
- breeches - short trousers;
- chaps - boots;
- Amazon - women's costume;
- spurs (optional);
- helmet (helmet);
- cylinder - headdress for men;
- tailcoat - clothing for men.
Russian companies do not produce riding clothes, but they can be ordered from the studio. Thick knitwear is used for trousers. Seamless models are preferred, but if this is not possible, seam treatment is required to prevent chafing of the skin while riding. Pay attention to the specific cut of the trousers, which ensures a comfortable fit for the rider in the saddle. For jackets, choose soft wool, warmer than is designed for the current weather, since during a gallop the rider is often exposed to cold air currents, which can lead to local hypothermia.
There are no uniform requirements for riding clothing; the cut of the uniform is dictated by convenience. For safety reasons, you will need a helmet; for convenience, good leather gloves that will protect the skin of your hands from mechanical damage from the reins.
Some tips
A rider who has saddled a horse should try not to leave it alone, always stay close to it and watch its behavior. After the saddle is completed, the animal should not be allowed to tilt its head down: this may create a girth. In addition, the mare can lie down with all her equipment, which will lead to numerous injuries and fractures of the hips.
The main thing is that the straps are correctly adjusted to the rider’s height, so you need to straighten your arm and place the harness along its entire length. It’s great if the harness reaches the beginning of the shoulder.
It’s not hard to saddle a horse, the main thing is to practice and take 1-2 lessons from specialists. They will tell you and show you how to saddle a horse and answer all your questions.
Saddling sequence
Correct saddlery begins with fixing the animal in a comfortable position and ends with checking the tension and adjusting the length.
- Secure the horse by the halter with a halter or place it on a turnout. The latter option is more acceptable, as it allows you to fix the animal in a comfortable position.
- Carefully inspect the animal, carry out a complete cleaning, including trimming the hooves.
- Prepare all the necessary ammunition nearby, make sure it is clean and intact.
- If everything is ready, then stand on the left side of the horse and place the saddle pad so that its upper edge reaches half of the withers. After this, smoothly lower it just below the edge of the withers. This is important to straighten the raised hairs.
- It is correct when the saddle pad lies flat and its edges are symmetrically located on both sides.
- If the situation or type of training requires it, place a gel or fur pad on the saddle pad where the saddle is located.
- Take the assembled saddle (when the stirrups are pulled up and the harnesses are fixed, the girth is raised) and carefully, without sudden movements, place it on the horse’s back just below the withers.
- If the girth is unfastened, it must be fastened on the right side to the girth, threaded through the saddle strap, wrapped around the horse’s belly at a level of 10 cm from the front legs and fastened in the same way on the left side.
- You should not immediately tighten the girth too much, as this may cause anxiety to the horse. Also, as riders say, horses very often “puff up”, so sufficient tightness in this case will be false when getting into the saddle. The girth is finally adjusted just before landing.
- If necessary, fasten auxiliary straps, for example, a girth and a shank, to the saddle or girth using special rings or fasteners.
- Now you can put on the bridle. To do this, take the rein and throw it over the horse's neck to secure it when you remove the halter. Place the headband on your left hand and, while supporting the animal’s head, remove the halter. We continue all actions on the left side.
- Take the bridle in your right hand by the cheek and poll straps, place the bit on your left palm and bring it to the horse’s mouth. Most trained horses open their mouths without any problems when pressing on their lips. If not, we increase the pressure on the lower edge of the jaw.
- Place the bit on the toothless edge of the jaw and pull the headband up, placing the neck strap behind the ears. Straighten up your bangs and mane.
- Fasten the chin strap, but not too tightly: your fist should fit between it freely. Fix the capsule if necessary.
- After this, the horse and saddle can be taken to the arena or training area. To avoid getting caught during the brood, the stirrups should be left assembled.
- After the inspection, before mounting the horse, check and tighten the girth again (your palm should fit freely between it and the horse’s body), lower the harness, and adjust its length. Usually it is 40 - 50 cm, but it is better to focus on individual sensations in the saddle.