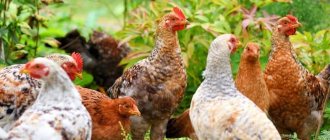
If you are faced with the task of raising chickens, then you need to understand that they need special care. Creating comfortable conditions should be a top priority, otherwise it will hardly be possible to raise a healthy bird.
Raising chicks under a hen makes the job easier because there is no need for additional heating. Chicks also learn from their mother how to search for food and water. However, nothing is impossible, and it is quite possible to raise healthy chickens without a hen.
What kind of lamps are used to raise chickens?
To install in an aviary with chickens, you can use different types of lighting:
- Fluorescent lamps.
The main advantage is efficiency. The main disadvantage is the frequent flickering, which is invisible to the human eye, but the vision of chickens is much sharper. Because of this, light can irritate birds.
- LED.
They are also economical in terms of energy consumption and have no flickering effect. In addition, such lighting has a long service life, has the proper level of protection, and emits light of a different spectrum. The main disadvantage is the high cost, so not everyone can afford this lighting.
- Combined.
They produce both infrared and ultraviolet radiation. They are a good option for installation in aviaries with chickens.
- Infrared.
They help you save on electricity and are reasonably priced. According to poultry farmers, this type of heating is most suitable for birds.
To raise chickens, electric heating pads, water heating, and a stove are also used as heaters, but infrared lamps are invariably the most popular, as they help solve the problem of lighting and heating at the same time.
Types of floor contents
There are several types of floor contents, which depend on certain factors:
- Availability of automation of feed and water distribution;
- availability of walking;
- possibility of purchasing a microclimate regulation system;
- seasonal or year-round rearing of broilers;
- number of livestock.
Below we will describe the basic schemes for floor housing of broilers.
A regular chicken coop without automatic water and feed supply with an attached run
The main condition for this method of keeping is the availability of high-quality food . All manipulations (feeding, watering, harvesting and cleaning) are done manually, so the farmer must have enough time to care for the livestock.
No-walk method with deep litter
The main condition is to prepare the room with deep bedding made from natural materials. Provided that automated lines for distributing feed and water and a ventilation system are installed, this method can support a fairly large herd - from a thousand heads. In this case, broilers can be raised all year round.
Application of mesh floors
To use this method, you need to carry out a number of preparatory operations. At a distance of about 0.5 m from the floor, it is necessary to build stands on which to install frames with a fine mesh stretched on top. The size of the frames is 1.5x2 m. Pallets (optional) are installed under the mesh to collect chicken droppings.
In this way, the farmer can earn additional income by selling the manure or making compost and selling it for an even higher price. A huge advantage of this method is that the birds do not come into contact with droppings, and thus the sanitary conditions of the poultry house are significantly improved.
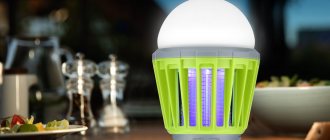
Principle of operation
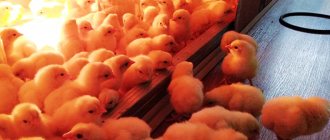
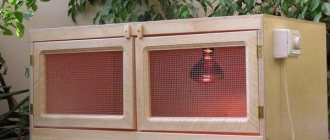
An IR lamp for heating chickens functions very simply - during its operation, electricity is converted into infrared radiation. The design is quite safe, since the production of the glass flask uses thick glass that is protected from moisture and shock. A special reflective material is applied to the inside of the glass to help focus and direct light and heat onto the chicks. Lamps must be installed at a height of 30-40 cm from the floor.
A heating lamp for chickens with a power of 250 W can illuminate and heat a room of 10 square meters. m. This is quite enough for raising birds. However, it is wiser to install several lamps in the chick brooder in case one of them burns out. Otherwise, if you are not around, the chickens will be left without heating, and this can turn into a tragedy for them and for you, respectively.
In order for chickens to grow, two factors must be observed: the organization of a confined space and the heat/light regime, since they are highly sensitive to temperature changes.
Types of heated floors for poultry houses
In a wooden chicken coop on the foundation, you can make an electric heated floor. It is available in two versions: film and cable. Film heated floors are most suitable for creating floors for birds. This is due to the fact that it is laid on a rough wooden base, and a concrete screed is not provided.
Floor installation in the chicken coop
This floor heating system distributes heat evenly throughout the room. The infrared floor quickly heats the air, it is energy efficient, durable, and the infrared radiation has a positive effect on birds.
No less common is a heated floor with a cable heat source, however, to install a heated floor you will need to make a screed from a cement-sand mixture and concrete. An insulating material, a reinforced mesh for rigidity, is placed on the screed, to which the laid cable is attached. Then apply tile adhesive, a layer of screed, and a top wooden floor covering. This heated floor is labor-intensive and costs a significant amount of money.
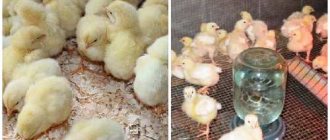
Chicken behavior
By observing the birds, you can find out whether they live comfortably in the brooder. If the chickens are running all over the room, then there is nothing to worry about - they are warm and cozy. If they huddle together and concentrate near the lamp, then they are cold. Then you need to set the IR lamp lower or increase the heating.
When the room is too hot, the chickens will be quiet, pant and scatter around. It is worth reducing the heating or installing the lamp higher.
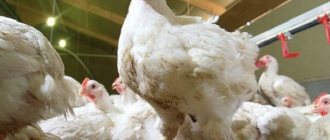
You can breed broilers and egg-laying chickens. The latter are much more mobile, so that they do not waste their energy, you can build fences. It is also necessary to install a drinking bowl and feeder.
Feeding and watering
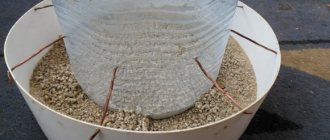
Feeders and drinkers for broilers are not fundamentally different from those for laying hens. Let us note once again that when keeping poultry on deep bedding, measures must be taken to ensure that water does not get on the floor. It is best to equip the drinking line with nipples and cups underneath. If you use trough drinkers, then you need to install drip trays under them.
- The feeding front for the first two weeks is at least 2.5 cm per head, watering - at least 1 cm of a trough drinker or 10-12 heads per nipple.
- For older birds, the feeding front increases to 8 cm per head, watering – to 2 cm.
The chick feeding line in this photo is cost-effective for keeping 500 or more broilers.
What are the benefits of a heat lamp for chicks?
- It is able to maintain an optimal level of moisture in the brooder with chickens due to the fact that excess moisture particles in the air evaporate when heated.
- Infrared lighting emits a calm and soft light that does not irritate the chickens and reduces their aggressiveness.
- Helps improve bird appetite and feed absorption.
- The IR lamp has a beneficial effect on the immune system of chickens.
- Such a heater has high efficiency.
- Electricity costs are 4 times less compared to other types of heaters.
- IR radiation dries the litter.
It is worth remembering that heating chickens with an infrared lamp is acceptable, but not adult birds.
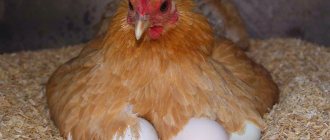
Heating eggs in an incubator
Most often, a do-it-yourself heated floor for chickens is created using one of three common heat sources. Let's look at the principles of their operation, as well as the advantages and disadvantages of using them.
Incandescent lamps
A well-known heating method that has been used for decades. A high speed of heating can be considered a plus, but it is offset by several negative aspects. For example, the inability to provide uniform heating.
Since the optimal temperature for proper development of embryos should be from 37.5 to 39ºС, the power of the lamps should be 80 watts or more. Such equipment will consume too much electricity and may suddenly fail. If you do not notice in time that the lamp has burned out and do not replace it, the embryos are at risk of death from hypothermia.
Infrared lamps
They are more suitable because they are able to maintain the desired temperature, dissipating heat evenly. However, the lower part of the masonry will still warm up less, since the heat rises upward. There will always be cooler air below.
In addition, this heating method cannot be called cheap. A lamp with a power of 125 W consumes too much electricity in 20 days, and this is exactly the time it takes for eggs to mature.
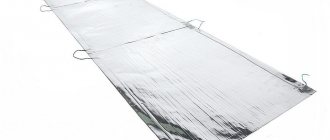
Film heater
Infrared film for an incubator is the most optimal device for organizing artificial heating. Its use is justified both from the point of view of efficiency and safety. The film is mounted on the floor, which ensures heating of the entire incubator space. If the structure is large, then to heat the entire area, IR film can be attached to both the walls and the ceiling.
The effect of infrared waves is very similar to the natural body heat of an animal, as if a hen were hatching eggs. They will not overcool or overheat, since the film is connected to a thermostat that can regulate the heating accuracy to 0.5 degrees.
How to properly organize a brooder?
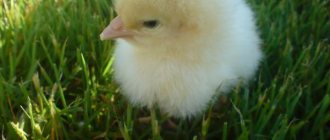
The place where the chickens will live is called a brooder. Day-old chicks are immediately placed in it, care for which is most important in the first days of life.
The chickens are kept in the enclosure for 3 weeks, after which they will need to be transferred to a brooder with feeders around the perimeter.
In the first days, newspapers or cloth should be laid on the floor of the brooder to keep the chicks warm and not blown in from below. It is also necessary that the heating lamp for chickens emits heat at 30 degrees, this will help dissolve the yolk in their bellies. The growth and health of the birds will depend on this. Such conditions must persist for 5 days. Further on the 10th day, the temperature should be at 26 degrees, then every week it is necessary to reduce it by 3 degrees. To quickly navigate the heat level, it is worth installing a thermometer.
A brooder for chickens can be made with the following parameters: length 70 cm, width 50, height 40. It is better to choose plywood as the material for the side walls, and roofing iron for the bottom.
While the chickens are growing, they are kept in 100-200 units in an enclosure; after they reach three weeks of age, they are seated in groups of 50 in new enclosures.
Main functions of the incubator
Different types of wood are ideal for making incubators, which can be replaced with chipboard, plywood or other similar materials.
Let us list the main tasks of this structure:
- Ensure sealing, do not allow cold air to pass through.
- Be completely safe for use.
- Heat the eggs evenly and continuously.
- Accurately maintain the set temperature of the heated floor for chickens.
- Be reusable.
- Use electricity as economically as possible.
Light mode
If you have day old chicks, care and proper lighting will have a big impact on their performance.
Experienced poultry farmers raise chickens in windowless enclosures with ever-decreasing daylight hours. By reducing daylight hours by 30 minutes each week, you can delay the puberty of chickens, but this will also promote good growth, the end of molting before laying, which will help produce larger eggs with a strong shell.
On the farm, this regime is only appropriate for chickens taken for rearing in June, when daylight hours last 15-16 hours. If chickens from the April-May brood are raised, they should be kept in an aviary with curtained windows and walked after sunrise. Long daylight hours provoke premature laying of eggs, and this leads to a decrease in productivity.
Thus, it is worth paying attention to every little detail to achieve success in raising chickens. It is worth remembering that the heating lamp for chickens is of particular importance in poultry farming. In addition, infrared radiation is used in raising livestock.
Main advantages
- The conditions for keeping poultry are as close to natural as possible. The result is less injury, better development of the musculoskeletal system, fewer leg problems, and good carcass quality at slaughter. The bird is exposed to less stress, it has a stronger immunity to infections and a high overall body resistance to other diseases, including metabolic disorders.
- When kept free-range, broilers at home receive additional pasture, fresh air and sunlight. All this improves the quality of meat products.
- Floor keeping will not allow an inexperienced farmer to cause significant harm to the poultry in case of violation of growing technology (such as sanitary conditions and planting density). Broilers are not limited in movement and are able to choose the optimal feeding, watering and resting areas for themselves. While in individual cages, due to the carelessness of the staff, the bird can die from lack of air, overheating, lack of water or suffer from a lack of feed.
- To organize floor housing, no special material costs are required for equipment for broilers.
The simplest temporary chicken coop for keeping on the floor (photo from the Internet). There is both a shelter and a walking area.
Lack of heat
A person can always protect himself from the cold - just light a fire, turn on the heating or put on warm clothes. Newly hatched chicks have virtually no protection as their plumage prevents them from keeping warm. Moreover, even adult birds suffer from winter cold, which leads to serious consequences:
- Immunity decreases - the bird becomes susceptible to infectious diseases;
- Activity decreases - the livestock becomes lethargic and lifeless;
- Egg production decreases - the number of eggs decreases by two or more times.
There is nothing good about hypothermia. And the chicks may even die if they don’t have enough warmth. If an infection appears in the poultry house, it can spread to the entire population.
Lack of heating leads to a slowdown in the rate of development of chickens. Feeling uncomfortable and lacking warmth, they will get sick and their growth will slow down, even if there is plenty of food. If a normal source of life-giving heat is installed in the poultry house, the livestock will feel more comfortable.
Optimal temperature
When chickens have hatched from a home incubator, it is very important to provide high-quality care for them at first. The young animals turn out to be generally unadapted to external factors, sudden changes in temperature or humidity. That is why you should adhere to clear recommendations from specialists, otherwise any minor mistake can lead to undesirable consequences
That is why you should adhere to clear recommendations from specialists, otherwise any minor mistake can lead to undesirable consequences.
The temperature during the first five days after hatching the chicks should be around +28…+30 °C. Whatever heating device you decide to purchase after the incubator, it is advisable to constantly monitor the temperature, which means that you cannot do without a thermometer.
Over the next five days, it is recommended to gradually reduce the set values, since by the tenth day of keeping the chickens, the temperature in the brooder should be no more than +26 °C. In the future, follow the approximate pattern: over the course of several months, temperatures should drop by 3-4 degrees weekly.
Remember that it is recommended to pay attention not only to the thermometer data, but also to the condition of the chicks: if the temperature for them is not optimal, this will be noticeable by the activity of the chicks. The temperature regime is set incorrectly if the following picture is observed:
- chicks are constantly in groups and move very little - this means that they simply freeze;
- The chicks have puffy down and wings, they drink a lot of water and try to stay away from each other - it is better to slightly lower the temperature in the device.
Whatever chick lamp is installed in the brooder or cardboard box, try to stick to the golden mean when heating them. Chicks suffer equally from both hypothermia and excessively high temperatures; they become weak and become easy prey for viral infections.
What does it represent?
The device is an ordinary light bulb.
It is screwed into an E27 ceramic socket. The glass bulb can be transparent or painted blue or red. There is a tungsten filament inside. It is located in a flask with an argon-nitrogen mixture. These lamps have specific radiation. It does not affect the entire room, but only objects that are nearby. Upon contact with them, infrared rays are absorbed and then transformed into thermal energy. Heating does not require a lot of time - the heat is felt immediately when the lamp is turned on.
Construction
Building a winter chicken coop with your own hands begins with the foundation. There are several optimal options.
Pile is the cheapest and easiest to implement. The weight of screw piles is small, so one person can install them. The screw blades in the form of empty metal pipes are 2.5 meters long and can be easily screwed into any soil, and installing such a foundation will not take more than an hour. The area needs to be marked according to the size of the future chicken coop. It is best to do this using a rope with pegs. Next, you need to mark the places where the piles will stand. First you should screw in those that will be in the corners of the room, and then all the rest. The piles should be installed at a distance of one and a half or two meters.
Columnar is also good for its efficiency and ease of installation. It can be done without much knowledge or experience. The installation begins by marking with a rope and pegs, then along the perimeter you need to dig holes 50x50 cm wide and 60–70 cm deep. The recesses should be located at a distance of about a meter, about 10 cm deep the holes are filled with a mixture of sand and gravel, then they are well compacted. A brick is placed on top of the cushion and the whole thing is filled with concrete mortar. You need to fill until the level along the stretched rope is reached. When the bases are ready, you can install cabinets or pillars on them. It is imperative that they be 25 centimeters or more above the level. After this, you can fill the area with gravel.
The tape type is difficult to implement, but its reliability is undeniable. To do this, you first need to dig around the perimeter of the poultry house. Then formwork is made, preferably from boards, and filled with concrete
In this case, it is important to adhere to the technology, the intricacies of which can be found out from specialists.
Of course, a chicken coop with a strip foundation takes a little longer to build, since the concrete will have to harden before the main construction work. For example, the construction of a building made of wood can only begin 21 days after pouring, and that of brick – after 28–35 days. The first two foundation options are good because they can create additional ventilation. With them in winter there will be no problems with rotting floors. In addition, during the spring flood period, the chicken coop will not be flooded.
When the foundation is ready, you can continue to build the winter chicken coop according to the selected drawing. The actual construction begins with the installation of the floor. First you need to build a so-called support frame, which is covered with boards from the bottom. Then logs are made at a distance of 50 centimeters. It is desirable that their cross-section be 100x150 centimeters.
Next, they move on to the construction of walls. If they are made of timber, then jute fiber must be laid between them, which is necessary to eliminate cracks. For walls made of OSB, you first need to make a frame of beams arranged in a grid. The walls must be sheathed on both sides to be able to fill them with insulation.
Windows and doors need to be made during the construction of walls
When installing, it is important to check their reliability and the absence of cracks. An important point is ventilation, which is easily organized using the simplest pipe
The penultimate touch is the roof, which can be pitched or gable. It is necessary to take care of its waterproofing, for which roofing felt is suitable. The last point is the creation of artificial light and the interior arrangement of the barn
It is important that chickens and moisture cannot reach the wires. It is best to place them in special plastic boxes
You need to lay a mat on the floor with a height of 7 centimeters. A beam with a diameter of about 6 centimeters is perfect for perches. Perches with a total length of 1.7 meters are enough for 10 chickens. Nests measuring 50x50 cm can be made from any materials, for example, wood, old tires. The main thing is that there are at least two of them. Drinkers and feeders can be wall-mounted or floor-mounted. The main thing is that the chickens feel comfortable using them. The very last thing you need to do with your own hands is to build an enclosure.