Breeding broilers is an extremely profitable business. Birds grow quickly, gain weight and, with proper care and maintenance, provide very high profits. To a large extent, the success of the enterprise depends on the chosen cross, as well as on compliance with the subtleties of incubation. Today, one of the most popular is the COOB-500 hybrid. Provided the correct choice of eggs and strict adherence to the indicators of the broiler incubation table KOOB-500, the farmer is guaranteed to receive healthy chicks with high immunity. Such chickens will grow into strong, healthy individuals at minimal cost.
Some farmers are inclined to believe that incubation is too troublesome, so they prefer to purchase already hatched chicks at the age of 7-10 days. This approach, according to many experienced poultry farmers, is irrational. The reason is that chickens of this breed are extremely restless when relocating. As a result of transportation, chickens become very nervous, often get sick and even die. Therefore, if a farmer is interested in high survival rates of young animals, the best option is to organize an incubator on his farm. Our article is about all the intricacies of incubating KOOB-500 broilers at home.
What are the features of incubating broiler eggs before others?
When deciding to incubate broiler eggs, you must take into account that this process has a number of features:
- They are larger, so less of them fits into the incubator than from laying hens.
- Place them in the incubator horizontally or obliquely. Due to their large size, they require a high temperature in the first day, but later it is reduced.
- From day 7 you need to start ventilating the container, cooling it. The eggs of all broiler birds are incubated almost the same. In the last days before the bite, they have a huge heat loss, so the chickens can overheat. So you should refrigerate them 2 times a day for at least 30 minutes. While cooling of chickens of other breeds should last less: twice a day for 10 minutes.
- The incubation period lasts the same as for other breeds - 21 days.
How to choose broiler eggs for incubation?
Broiler eggs must meet special requirements, since not all of them can be used for incubation. You need to take eggs of the same shape and size. Chicks that are too small are not suitable for incubation as the chicks may be weak. And too large specimens often contain 2 yolks, so they will not be fertilized.
Before placing an egg in the incubator, you need to make sure that it is fertilized. To do this, you need to illuminate it with a light bulb. The fertilized material should have a clear dark dot in the center.
You cannot take pear-shaped, round or elongated eggs. The chicks will hatch, but they are unlikely to be healthy. The shell must be uniform, without thickening, growths, or cracks. The air chamber should be on the blunt side, not exceeding 1.5 cm. If its size is larger, the egg has been lying around for a long time, so it cannot be used for incubation.
The yolk should be located strictly in the center, or slightly deviate towards the air chamber. If it sticks to the shell, the egg is not used. If it is fresh, then when viewed through an ovoscope, the yolk should be slightly blurred around the edges. If it is too dark, the egg is rejected.
For bookmarking, select specimens of approximately the same shape and weight (50-60 grams). Each extra gram prolongs the hatching process by 30 minutes, so the weight of the eggs should not differ by more than 10 grams. Otherwise, the chicks will not hatch at the same time and will have to be kept separately.
Characteristic
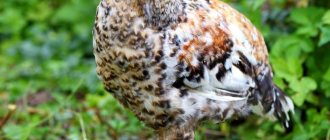
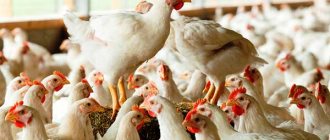
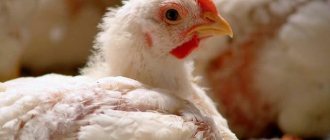
The Ross 308 broiler chicken breed has special descriptions; its representatives are too different in appearance from other breeds. These birds have a massive oval body, a strongly protruded chest and well-developed muscles. The legs are widely spaced, strong and brightly colored, the hips are clearly visible.
The main feature of Ross 308 broilers is considered to be snow-white plumage without the presence of other shades. If colored inclusions are noticed on the feathers, this indicates that the breed is not purebred.
In addition, when developing this breed of broiler, breeders worked hard to ensure that the birds’ skin had an even skin tone. This gives the carcasses a marketable and attractive appearance. The skin is also characterized by increased elasticity; it does not deform or slip when frozen. The head of chickens is small, it has a neat leaf-shaped comb. As for the earrings, they are poorly developed in broilers and stand out against the general background with a bright red color.
Although chickens have the blood of fighting breeds in their blood, they have a peaceful character and do not participate in fights in the poultry yard, but if necessary they can stand up for themselves. Since broilers of this type prefer to lead a sedentary lifestyle, they can even be kept in small cages, which is excellent for growing in country houses.
Before placing in the incubator
Storage takes place at 3 points: farm, transport and hatchery room. It is necessary that all these places have approximately the same conditions. Sudden changes in temperature and humidity should not be allowed. The temperature drop should be smooth, and in the same way the temperature should rise smoothly before being placed in the incubator. Therefore, at first the eggs are kept in the room for some time, and only after that they are sent to a container.
Eggs should not be stored for long, as this causes the following:
- The time allocated for incubation is extended. So, every day increases the incubation period by about an hour. It is advisable that all eggs have the same shelf life.
- Chick hatchability decreases. They need to be stored for at least 6 days, since after a week the hatchability decreases to 15%, then decreasing every day.
Table 1. The influence of storage time of broiler eggs on the hatchability of young animals
| Amount of days | Hatchability |
| 5 | 91,6% |
| 10 | 82,5% |
| 15 | 70,3% |
| 20 | 23,5% |
| 25 | 15% |
- The vital signs of chickens and their weight decrease. When eggs are stored in the hatchery for more than 14 days, water evaporates from them and the concentration of carbon dioxide in the protein increases. Therefore, the quality of future young animals deteriorates.
Before placing eggs in the incubator, they should be processed. To do this, they are washed in a solution of potassium permanganate, which serves as an excellent disinfectant. Warm water at a temperature of 30 degrees is poured into a container intended for washing. After this, potassium permanganate is added so that the solution gets a rich crimson color.
You need to carefully lower the eggs into the solution so that their contents do not shake. They should be kept in the liquid for 5 minutes. Clean specimens are spread onto a cloth and left until the water drains. After complete drying, they can be placed in the incubator.
Conditions for keeping
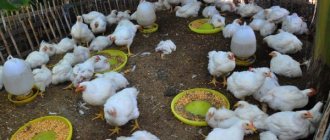
After broilers are purchased, they must be immediately placed on the farm. In this case, the young animals must be placed in brooders for the first week and the temperature in them must be maintained within the range from +30 to +32°C.
Young individuals are demanding in care for the first month of life, then the temperature can be gradually lowered by one degree to +20°C.
The humidity in the room where the chickens are housed also plays a huge role. The first week it should be at least 65%, then a level of 55% is allowed. To ensure rapid growth of birds, it is recommended to illuminate the room for 22 hours, gradually reducing the illumination to 13 hours. In addition, the chicken coop should be kept clean and the feeders should be washed regularly and then filled with sufficient food.
Raising chickens of this breed can be done in various ways.
- On the mat. This housing option is considered one of the most popular, but when choosing it, you should take into account the fact that young animals are demanding on the quality of the bedding. If it is made of bad material, then the chickens will freeze and get sick, losing weight. Experts recommend purchasing loose and hygroscopic material for bedding that has the ability to absorb gases. Pre-dried sawdust from pine needles is considered a good choice for this, but the use of sunflower husks and sphagnum peat is also allowed. The bedding is spread in a small layer of up to 7 cm. When raising Ross 308 broilers, one must not forget about constantly maintaining the temperature regime, providing additional heating of the room with electrical appliances, which are fenced with plywood sheets 40 cm high at a distance of 50–60 cm from the chickens. This type of housing has several advantages : provides birds with a comfortable life and makes them easier to care for.
Bookmark
Before laying, the eggs are transferred from storage to a room with a temperature of 25-27 degrees and kept here for about eight hours. This is necessary to ensure that the egg has the same temperature over its entire surface.
If the room ventilation is poor, the process may take longer. Therefore, it is recommended to ensure good air ingress. In addition, before laying, pre-incubation heating should be performed for 6-12 hours.
It is better to place broiler eggs for the incubator horizontally or at an angle of 45 degrees. There should be a small distance between them so that they do not overheat. The number of eggs depends on the incubator model; this number must be strictly observed.
Turning and spraying
Turning is necessary for the normal development of chicks. They should be carried out regularly several times a day, especially in the first week, so that the embryo does not stick to the subshell membranes.
From the second week, the number of turns can be reduced, but they cannot be stopped completely. They help remove excess heat from the surface of the eggs.
Spraying is carried out only if the humidity in the incubator is low. Only warm water is used to avoid hypothermia.
Temperature and humidity conditions in the incubator
For good hatchability of eggs, it is necessary to follow a certain regime. After buying eggs, you need to leave them in the room for several hours so that they come to room temperature.
Then they can be placed in an incubator, in which the temperature is set to 38 degrees. After a few hours it is lowered to 37.5 degrees, and it should remain constant until the 14th day of incubation. After two weeks it is reduced by 0.3 degrees.
The right temperature improves the embryo's metabolism, increasing the rate of its development. It should be constant, without sudden changes. It is necessary to fill the incubator completely, since due to partial filling the chamber will warm up unevenly. If it is overloaded, overheating may occur.
In the first week, the humidity should be 50-55%, then it is reduced to 45%. From 15 to 18 days it is increased to 50%, and just before biting - to 65%, so that it is easier for the chickens to break through the shell. The rate of moisture loss depends on the vapor conductivity of the shell. By day 18, the egg should lose approximately 12% of its moisture, which significantly improves hatchability.
Table 2. Temperature and humidity conditions for incubation of broiler eggs
| Period | Deadlines | Temperature | Humidity (%) |
| 1 | 1-7 days | 37,5 | 50-55 |
| 2 | 8-14 day | 37,5 | 45 |
| 3 | 15-18 day | 37,2 | 50 |
| 4 | 18-21 days | 37,2 | 65 |
Preparation
The preparatory stage is very important for the entire incubation process. The first step is choosing which eggs to incubate. Eggs must be fresh, no more than 5-6 days old. The ideal option is 1-2 days. It is not advisable to use specimens stored for more than a week - the percentage of chicks hatching decreases, the incubation time increases, and the chicks may turn out to be weak and sick. When purchasing the starting material, check the storage conditions of the eggs to see if they have been subjected to temperature changes - sudden overheating or cooling harms the embryo.
Carefully inspect the eggs for external damage. Any cracks, growths or other irregularities on the shell are grounds for rejection. Try to select specimens that are identical in size and volume, sticking to the “golden mean” – a weight of approximately 55-60 g and medium dimensions. Eggs that are too small - there is a risk of producing non-viable or sickly offspring. Too large ones are often unfertilized (2 yolks).
Also pay attention to the shape of the eggs - it should be classic (an oval slightly narrowed at one end).
Any deviations (pear shape, elongation or excessive roundness, etc.) are unacceptable; this is the first sign of infertility.
The following procedure is optional, but highly desirable - checking the eggs for fertilization. Naturally, for this you will need special tools, for example, an ovoscopic lamp. You can assemble it yourself or purchase it in a store.
Let's look at the signs of a successfully fertilized egg (when illuminated with a lamp).
- The presence in the middle of the yolk of a clearly visible dark spot of small size (literally 2-3 mm).
- Uniform shell thickness.
- A small air chamber (about 1.5 cm in diameter) located closer to the blunt end of the egg is clearly visible. Blurry images and a different location indicate that the eggs are stale and, therefore, unsuitable for incubation.
- The yolk should be one and located in the center, or it should be slightly shifted to the blunt part of the egg, while its boundaries should be fuzzy and blurred.
- When trying to spin quickly, the movement of the yolk should be slow.
- Apart from the embryo, there should be no dark spots in the egg: blood clots, parasites, and so on.
Then you should carefully clean the surface of the shell from various contaminants - they clog the pores, thereby depriving the embryo of the flow of oxygen. To do this, you can use a strong solution of potassium permanganate at a temperature of 25-35 degrees. Carefully lower the eggs into a container with a solution of potassium permanganate and leave for 4-5 minutes. This treatment will also allow you to disinfect the eggs, in addition to cleaning them from dirt and debris. Of course, you can get by with just warm water for rinsing.
After this procedure, carefully place the eggs on a cloth (do not wipe) and let dry. They can then be loaded into the incubator. Broiler eggs should be laid horizontally or at an angle of up to 45 degrees. The choice of this position is determined by the size and weight of the eggs, because a vertical position will inevitably lead to the embryo sinking to the bottom and its subsequent deformation and sticking to the inner surface of the shell.
Incubation stages
Egg incubation occurs in several stages:
- First week. At this time, the eggs are laid in trays. The incubator must be set to a certain temperature and humidity. The formation of the embryo begins.
- 7-11 days. The temperature drops by about 1 degree. At this stage, all eggs are checked; if there are any bad ones, they are thrown away.
- From 11 days until the first squeak, the temperature remains the same. It is especially important to monitor the humidity; it should be 45%. In high humidity, chicks may die.
- Lasts until biting. Humidity is increased to 70%, and the temperature is increased by 1-2 degrees. This will make it easier for the chicks to hatch.
Stages of Broiler Incubation
Hatching from eggs depends on several factors. If the temperature is high, the shell cracks more easily, which is why it is increased. Large eggs take longer to incubate. Also, if they have been stored for a long time before incubation, the chicks will hatch later.
Typical beginner mistakes
Often beginners make mistakes in the process of breeding broiler chickens:
- Incorrect placement of the thermometer. If placed close to a vent, it will show a lower temperature. This means that the eggs may overheat. Because of this, chicks may hatch early, but they will be very weak.
- Different temperatures in different parts of the container. Therefore, once a day you need to change the eggs in places: from the center to the edges and vice versa.
- High or low humidity. It is necessary to follow it according to incubation periods.
- Underheating is a common cause of mortality in chickens. They come out later, their navel is not pulled in, their paws are thick, so they cannot stand up.
So, before you start incubating eggs, you need to learn all the intricacies of this process. After all, just one mistake can lead to a weak brood.
←Previous articleFeatures of the “Universal 55” incubator Next article →Incubation of quail eggs: from selecting eggs to hatching
Tips for Beginners
If you want to try raising broiler chickens at home for the first time, here are some simple tips from experts.
- 2-3 days before adding the product to the device, do not forget to thoroughly rinse and disinfect the incubator. A bleach solution is often used for disinfection. After these procedures, the device must be rinsed and dried.
- After washing the incubator, be sure to set it up and check the operation of all systems. To do this, run it for 10-12 hours in operating mode and test it. If you find any problems, try to fix them yourself or invite a professional.
- The ideal option is to place the eggs in the incubator in the evening. In this case, the chicks begin to hatch in the morning of the 21st day, and by the evening almost all of them have recovered and can even eat. Evening laying has one more advantage: examinations of eggs using an ovoscope, carried out at the beginning of 7 and 18 days after the start of the incubation process, are more comfortable to carry out in the evening, without rushing anywhere.
- Do not place the eggs close to each other; the gap between them should be at least one and a half centimeters. A closer arrangement is fraught with overheating and death (developmental disorders) of the embryos.
- Carefully monitor the temperature and humidity conditions in the chick hatcher. Small short-term fluctuations, of course, may occur, but it is still advisable to avoid such deviations. Prolonged temperature violations are strictly prohibited. In this case, the location of the thermometer is very important - do not hang it next to the ventilation hole, in this case its readings will be underestimated. If there is uneven heat distribution in different parts of the device, just regularly swap the eggs: move them from the center to the edge, and vice versa.
- On days 19-20, install an additional container of water in the incubator to increase the humidity level and make it easier for the chicks to emerge.
To summarize, we can say: raising broilers at home in an incubator is a task quite suitable even for a beginner.