I am a beekeeper with many years of experience. I live in Siberia. Therefore, climatic conditions make their own adjustments to the preparation of bee colonies for wintering. In this article I will share my experience in preparing for wintering bees in omshanik.
I keep the bees in 16 wooden frame hives and 14 polystyrene frame hives. I begin preparing bees for wintering in the last ten days of July, when the main honey harvest has not yet ended. Preparation during this period consists of providing the bee colony with empty honeycombs in order to create normal conditions for the queen to work. The brood grown in August will make up the bulk of the bees heading into the winter. For this purpose, I substitute wax or dried soil into the brood part of the nest, and after August 1 I substitute only dry material, because The bribe ends, and the bees stop drawing back the foundation.
The essence of the method
Moving hives indoors for the winter makes sense not only in places with unpredictable weather conditions, but everywhere. Your main task is to provide the bees with the most comfortable conditions for complete peace. In this state, they behave more calmly, spend less food, and do not overcrowd their intestines.
You can use a regular barn as a winter hut (the room where the hives will be located). It should be dry and relatively warm, not blown by winds or get wet during thaws. Existing windows should be covered with thick fabric that does not allow light to pass through. The fact is that during the rest period, light is the main irritant for bees, so lamps should be used only in extreme cases.
Another important point is rodent control. Favorable conditions are created indoors not only for hives, but also for mice, which can cause irreparable harm to the farm. You shouldn’t wait for rodents to arrive, because it’s not always possible to notice them in time. As you know, the best way to defeat an attack is to get ahead of it. Use special rodent baits in advance and your hives will be completely safe.
Advantages and disadvantages
When communicating with other beekeepers, you can meet many opponents of this method. This is understandable, because not everyone has free space and additional funds to build a separate room. However, a winter hut for bees has many advantages that will allow you to feel calm on long winter nights.
Initially, this concerns feed consumption. If we compare the cost of food between a hive left outside and one that is indoors, then the consumption of the first will be twice as much as that of the second. Such savings seem insignificant for one or two families, but if you have a large apiary, then the savings are obvious.
Less feed consumption contributes to better health of bees when leaving the winter hut. Spending less energy on digesting food, they save it for the spring, as a result of which they remain more active and healthy. This is a very important factor, because every additional day of life of old bees will help the young ones quickly get stronger and put the hive in order.
In addition to significant savings, omshanik provides unhindered access to bees at any time. Even if there is a snowstorm outside, this will not be a hindrance for you, and you can quickly check the condition of your pets.
Omshanik also has disadvantages. First of all, this is the likelihood of increased temperature or temperature fluctuations. For a comfortable stay and a state of complete rest, a stable temperature regime within 0-4°C is required. The slightest fluctuations in one direction or another bring the bees into a state of increased vital activity. The consequence of this will be an increase in the consumption of honey reserves and digestive problems. As a result, a weakened family may suffer great losses or may not survive until spring at all.
Requirements for winter shelter
An ordinary shed can be used as an omshanik, but it must be well insulated. It is unlikely to be possible without additional insulation.
Among the main requirements for a winter shelter, the following should be highlighted:
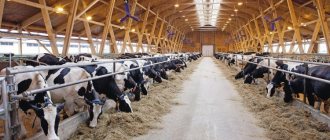
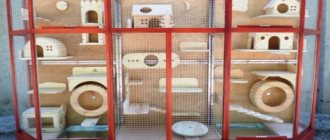
- the room must be designed for at least 100 hives. This number of houses helps to establish optimal living conditions (microclimate);
- the presence of sound insulation - insects feel restless in a noisy environment;
- in the event that there are 260–280 hives in the winter hive, one entrance located on the south or east side is sufficient; if a larger number of hives will winter, two entrances should be equipped, located in opposite walls;
- doors must be insulated;
- the end sides of the room should be oriented along the north-south axis;
- the minimum floor thickness is 0.2 m, it is best to make a base from a mixture of crushed stone and clay, covered with sand;
- the height of the room is 2.6–3 m, the distance between the hives and the walls is at least 15 cm, the rows are located 0.8–1 m from each other;
- the room must be built in a dry place, with deep groundwater;
- the correct omshanik should have a basement or semi-basement structure;
- air temperature within -2...+3°С, maximum +5°С, higher temperatures have a negative effect on insects, leading them to an excited state;
- type of ventilation - supply and exhaust, it is better that it is adjustable;
- insulation only with thermal insulation, installation of additional heating devices is extremely undesirable, since in this case oxygen is consumed;
- It is necessary to have a water outflow system;
- the room must be dry.
Did you know? One honey bee with an average lifespan of 1.5
–
6 months, in its entire life brings no more than 1/10 teaspoon of honey.
Advantages of wintering bees in a barn or omshanik
Most beekeepers will naturally agree that the best wintering for bees is in the wild . If bee colonies overwinter outside, they will undoubtedly be stronger and more resilient than those that overwinter indoors. Usually, they do not sleep, but fall into suspended animation for the winter , but at the same time remain active and feed on honey all winter.
The bee colony begins to actively prepare for wintering in the spring and continues to do so for most of the summer. These insects can survive the winter very well if they cluster together in a club that looks like an ellipsoid. Inside the club, each bee is quite free and in constant movement, thanks to this the temperature in the center of the bee club reaches 25-30 degrees . And the external individuals create a dense shell, which can be from 3 to 7 cm thick, and the optimal temperature of the outer edge is about 15 degrees. So, bees can easily survive the winter.
But due to the fact that the climate is changing now, and sometimes the weather in winter can be unpredictable, it may be unsafe to leave hives outside for the winter. When there is no snow in winter and there are temperature changes, this changes their usual behavior and they may not survive the winter.
What is it used for?
Omshanik is a small room where beehives are brought during the winter cold. Another name for the building is a winter shelter. It is built mainly in cold regions, where winters are especially harsh.
Thanks to omshaniks, bees endure winter more easily and consume less honey reserves. In addition, the design allows the beekeeper to monitor the condition of the insects without disturbing them too much. During the winter, you need to visit the farm several times to check the temperature in the room, food supplies and the health of insects.
In summer, the need for a winter shelter decreases. But it can be used as a storage room for tools.
Peculiarities
As you already understand, wintering bees indoors has its own characteristics. First of all, this is a strict temperature regime. Sharp fluctuations or temperature increases of more than +4°C can become a catalyst for irreparable consequences. Provoked activity can cause premature egg laying, increased humidity levels inside the hive, and a reduction in bee life expectancy. In this regard, the temperature inside the barn is constantly monitored and maintained at the required level by ventilation or heating.
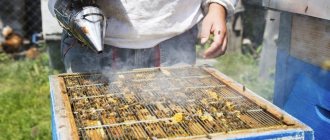
It is strictly not recommended to make noise near the hives; even a small click can cause severe anxiety inside. An alarmed bee may even go outside, and this is inevitable death for it. Despite this, you must check the status of the swarm very carefully. To do this, simply lean your ear against one of the walls. If everything is fine inside, you will hear a barely perceptible buzzing sound.
Check the condition of the bees inside the trap about once a month. During the inspection, it is better to use a lamp with red light. Thanks to him, “sleepy” bees will remain calm.
Preparing the winter shelter
In order for the bees in the winter hut to feel as comfortable as possible, it must be properly prepared. You shouldn’t put off work until the last minute, because with the onset of cold weather, an extremely stressful period awaits you. You need to constantly take care of the premises, then you can avoid emergency situations. By bringing the room into proper condition, you will do everything possible to make the bees feel as comfortable as possible in the winter hut. Before they go into long-term rest, the following measures must be taken:
- collect garbage, clean the ceiling and walls from cobwebs and dust;
- remove traces of dampness by prolonged drying;
- seal cracks in walls, floors and ceilings to prevent rodents from entering;
- for the purpose of disinfection, carry out lime whitewashing of walls and shelving;
- check the condition of the electrical wiring;
- if necessary, insulate problem areas in the shelter.
Creating a strong family
The unification of families is carried out in the evening through a frame with dry land filled with syrup, or a diaphragm. This causes the queens’ activity to subside, so they will live peacefully after the union.
It is recommended to place one mother in an incubator. Then the weakened family will move more without additional help to maintain the temperature. Family reunification will help in the fight against a disease such as nosematosis. When preparing for winter, you should not put frames with beebread in the houses. It is better to install them after the spring flight. The connection is completed by covering the body with film.
Correct assembly of a bee nest for the winter by a beekeeper
In home apiary conditions, families are fed throughout the cold season with honey prepared in advance or processed sugar syrup, since beekeepers take commercial honey. Accordingly, part of the honeycomb becomes unnecessary for the bees. From here the desired amount of food for the winter per family is calculated. If this is not done, the bees will form a winter club on completely empty combs, which will lead to the death of the colony in winter.
The nest is assembled depending on the strength of the family itself and the type of hive. If the family is strong, then it is assembled in an “arch”. Those. heavy-weight frames are placed on the sides, and less heavy ones (up to 2-2.5 kg) are placed closer to the center. In this case, an additional frame with food is placed in the very center (above the wintering club of bees). If the family is of average strength, then the food supply in the nest is placed at an angle. The arrangement of the remaining frames is in descending order from the sides. When weak, heavy frames are placed in the center, and less heavy frames are placed on the sides. This type of nest is called a "beard".
It is also necessary to pay special attention to ventilation. In the winter club, the bees move upward, since all the food is there. These movements are slow but constant. If the frames on which the bees were placed are eaten, then there is a very small chance that they will end up on the next full-sized one.
A particular danger is when a winter club can split into two parts during the winter. This can happen when the beekeeper mistakenly formed the nest so that the frames without honey, but with brood, ended up in the center. The frames will subsequently be freed from brood and will turn out to be completely empty, which is why the club may collapse. To prevent this, full honeycombs are placed outside the outer limits of the nest's honeycombs, and empty ones take their places with the obligatory feeding of the bees.
Where do bees spend the winter?
Bees, contrary to expectations, do not sleep in winter. They gather in a ball, which helps keep each other warm. Metabolic processes slow down and the amount of feed consumed decreases. This causes rare bowel emptying. Inactivity is a factor that helps maintain the strength required to survive in the cold season.
A question that requires clarification is where do domestic bees usually spend the winter? There are two common options:
- a well-insulated room (omshanik, cellar, barn) - winter hut;
- street - houses for insects remain in the apiary.
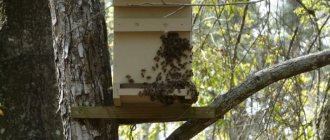
Under natural conditions, bee colonies tolerate cold well and remain viable by organizing nests in tree hollows. Beekeepers practice a similar method and leave the insects in the wild. The main thing is to equip the hives with insulation. The wintering period begins in November and lasts until April.
Nutrition of bee colonies in winter
You should start preparing honey in mid-summer, when the honey harvest is in full swing. To prepare bee colonies, be sure to use only dark-colored honeycombs. Because they are the warmest. A complete seal of the combs is desirable, i.e. All honeycombs must be covered with wax caps. This is the best protection for honey from moisture or too dry air.
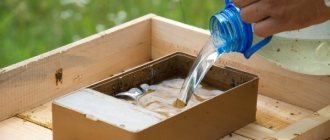
There are times when the honey harvest is interrupted due to weather conditions and timely procurement of honey by bees is impossible. Then feeding comes to the rescue. It serves as thick sugar syrup. It is made in large portions, pouring 5-10 liters at a time into large feeders. This is what distinguishes spring feeding from autumn feeding; in the spring, bees are given 0.5-1 liters of feeding.
How to place and bring in hives?
There is no need to rush into placing bees in the winter hut. If the weather is relatively good in October-November, then give them the opportunity to make one last flyby. The hives are moved indoors before the onset of cold weather, that is, until approximately mid-to-late November.
When moving the hives, the bees must remain as calm as possible. To do this, the entrances are closed, and the hives themselves are taken very carefully. Do not make unnecessary movements, otherwise the bees may become alarmed.
When the bees are completely brought into the winter hut, the door to it is left open for 2-3 days. The same goes for ventilation. This is necessary so that the omshanik cools down and the bees finally calm down. From this moment you can open the upper entrances. You need to remove the insulating pillows from the top, replacing them with light mats made of sedge or cattail.
All that is now required from the beekeeper is periodic checks of the hives and compliance with the temperature regime.
Comparison of underground and above ground construction
Would you like to know which version of the omshanik is better to build? Then check out the main differences. Thus, an underground winter hut, as noted above, cannot be built where groundwater is close to the surface.
An above-ground structure requires additional thermal insulation, while this is not required for an underground/semi-underground winter hut.
Expert opinion
Ponomarev Sergey Stepanovich
Beekeeper with 30 years of experience, Candidate of Technical Sciences
To build an underground omshanik, it is advisable to have experience in this field - such a structure is more complex to construct.
Principles for successful wintering
In order for bees to successfully overwinter, it is advisable to create favorable conditions:
- the most important thing is to provide families with the right amount of food;
- depending on the wintering method, it is necessary to carefully prepare the hives or the premises in which they will be located;
- take care of insulation;
- monitor the humidity level in the hive;
- think over the ventilation of the bees' nest;
- provide families with complete peace and quiet
- hives should be protected from mice and birds entering them.
- protect the hive from direct sunlight.
Preparatory activities
In the spring there is an exhibition of insects from the house. At this time, you need to inspect the families and restore order in the hives. It is necessary to open the ventilation holes and doors to dry the winter hut. Make sure that birds and mice do not get into them. Considering that during the winter the sand manages to become damp, it must be dried in the sun.
Before bringing the hives into the house, all things, equipment and tools are taken out. In the summer, the boards are checked to ensure they are free of mold and rot. Ventilation pipes are covered with new mesh. It is important to disinfect the room, whitewash and fumigate with smoke. Check the roof for leaks, as well as the corners to ensure there are no mouse nests.
Control of wintering of bees
Winter bee inspections are best done when the air is not very cold. The hive quickly and quietly opens and determines where the winter club is located. If it is below, this means that wintering is going well. If it is at the top, this indicates that the food is running low and additional food or a frame of honey needs to be added. The cause of restlessness among bees and increased noise coming from the hive is often a lack of food. Accordingly, families should be fed. And if mold is found in the hive, then immediately remove the insulation and increase ventilation.
When controlling bees in the winter hut, it is necessary to use only red light, since sunlight and white light have an exciting effect on them and they can fly out of the hive. It is necessary to act without noise or sudden movements, so as not to disturb the family.
The success of wintering can be assessed by the amount of death. If there is not too much of it, then everything is fine. If there is a lot of waste, then it must be removed from the bottom with a special scraper. It is worth paying attention to the moisture content of the deadstock; if wintering is successful, it should be as dry as possible.
When it gets warmer outside, the hives need to be moved overnight to the places where they were in the summer. In this case, it is useful to replace the donya with new ones. Because it is located on old bottoms, one can judge how the insects overwintered.
The presence of a hum or noise inside the hive indicates problems in the club. These may be high temperatures, high humidity or lack of food. When wintering is successful, the bees inside sit quietly and calmly and do not make any increased hum or noise.
How to build?
When building an omshanik, you need to decide on the type of structure and only then proceed with preparation.
Preparatory work
Particular attention should be paid to the area on which the winter hut will be built.
It must meet the requirements:
- Protection from water. To check at what depth the groundwater is located, you should dig several holes in the spring. If water begins to accumulate in them, such an area is not suitable for construction. You also need to make sure there is no threat of floods.
- Location. You need to place the omshanik not far from the apiary, so it will be easier to bring in the hives. Ideally, the structure should be placed in a ravine or on the slope of a small hill. This way it will be protected from the winds.
- Entrance placement. It is better to do it on the south side so that when the door is opened, less cold wind enters the room. In the winter huts, where more than 100 families of insects will live, there are 2 entrances - on the north and south sides.
- Area calculation. When drawing up a construction scheme, you need to take into account that the width of the passage between the racks should be about 1 m. A rack for placing hives in 1 row is at least 70 cm, in 2 rows - 160 cm. A distance of about 20 cm should be left between the hives. It is also not necessary place the hive close to the wall. Taking this into account, the total area of the building is calculated. It is better to make omshanik a little more than required, because the number of bee colonies may increase in the future.
- Calculating expenses. You need to decide in advance what materials will be needed for construction and calculate their required quantity. Mark the future territory of the winter hut.
Selection of materials
It should be remembered that when building an omshanik, materials will be required not only for the construction of the room, but also for the manufacture of shelving, doors and ventilation pipes.
Therefore, you need to prepare the following:
- Tree. You need bars or logs. Prepare polished boards, frame, slab. It is better to choose strong wood that retains heat well.
- Stone. You will need bricks and ordinary stones. To strengthen the walls, prepare sand, crushed stone, and lime.
- Metal. Metal corners, channel and pipes.
- Insulation. Due to the roofing material, waterproofing is created. You will need film, reed slabs and adobe.
Pay special attention to the materials for creating individual elements of the omshanik:
- Floor. It can be created from concrete, clay, wood.
- Walls. In underground structures they are made of brick, in others they are made of wood.
- Overlap. Reinforced concrete is used. Be sure to take care of waterproofing.
- Roof. It can be made from boards. For insulation, the ceiling is laid with moss, straw or sawdust, or polystyrene foam.
Construction
Below are step-by-step instructions for building different types of omshaniks.
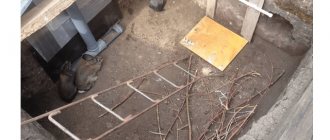
Details about the construction of an underground type of omshanik:
- Dig a pit. To do this, it is easier to hire an excavator. You can use a shovel, but it takes much more time. The depth of the pit is 3-5.5 m. After digging, level the area well. To do this, use a special ruler-level. Using a shovel, create a groove through which the condensate will drain, and also dig a place at an angle to install the ladder. Its width is at least 1 m.
- Making the floor. Fill the bottom of the pit with concrete or line it with boards as spacers. Place formwork boards along the edges. They must be placed at the same level. Pour a layer of concrete about 20 cm thick. Level it. Wait for it to dry. The formwork can be removed 2 weeks after pouring the concrete.
- Walling. It is better to use a double layer of brick. Before laying, moisten each brick in water. Dry brick may crack. Fill the gap that forms between the lower bricks and the floor with clay. Use metal tubes to strengthen the structure. Make a metal frame from below and lay a channel on top. For strength, weld the metal frame elements together. You also need to make a frame on top.
- Creating a roof. Lay boards on top of the frame. They need to be well strengthened with concrete mortar and wrapped in film. Lay with a double layer of reinforcing mesh. Fill the top with concrete. Wait 1 week for it to harden.
After this, you can cover it with a layer of roofing material and cover it with earth. Above the ceiling, you can equip an attic space for the removal of ventilation pipes and storage of tools. The roof itself can be made of boards or slate. Insulate with reeds.
- Arrangement. Lay the steps with concrete slabs or fill them with mortar. Before entering the omshanik, you can equip a vestibule, thanks to which it will be possible to retain heat.
Whitewash the walls indoors. Provide ventilation using plastic or metal pipes. Be sure to take care of lighting in the winter hut. It's better if it's double. A diffused red color is ideal for caring for bees.
Make sure there are no cracks in the omshanik. If they are found, cover them with a layer of foam.
You can clearly see what the design of a finished underground winter hut looks like while watching the presented video:
The method of constructing a semi-underground is similar to the construction of an underground omshanik.
The steps are as follows:
- Site preparation. To do this, clear the place where you plan to put the winter hut, remove weeds and small debris. It is advisable that the site be level.
- Creating a foundation. Dig a pit 1 meter deep.
- Making the frame. It is made from beams or bricks. When creating walls, you need to provide space for windows and doors in advance. Wooden boards are nailed on top of the frame.
Be sure to line the walls with insulating material. If polystyrene foam is used, it is secured with polyurethane foam. You can make the cladding with plywood, but then the materials will cost more.
- Construction of the roof. It is made predominantly single-pitched. For this, wood, roofing felt and insulating material are used. If you make a gable roof, then you can store beekeeping equipment in the resulting attic.
- Interior decoration. Wooden racks are installed inside; they can be made of 1 or 2 tiers. Ventilation pipes are attached. They should be placed under the ceiling or inside the attic.
Sequence of work during construction of an above-ground type:
- Place wooden posts around the perimeter. They need to be immersed in the ground to a depth of about 80 cm. The total height of the posts is 1 m.
- On top you need to make a frame from timber and nail logs about 60 cm long.
- Line the floor with wooden boards.
- Above ground level, you can use not only brick, but also wood to build a winter hut.
- It is better to make windows under the ceiling so as not to provide artificial lighting.
- The roof can be made gable or single-pitch.