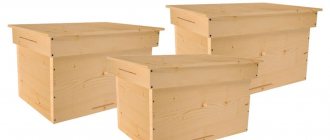
Carriages have long been a means of transportation for famous, wealthy people. But the time when driving carriages was the main method of moving horse-drawn vehicles is long gone. However, even in our time, unique and luxurious carriages can be seen on the streets of different cities around the world. They are used as a means of transportation by tourists, magnificent wedding processions and simply lovers of antiquity.
Horse-drawn carriages or horse carts can be purchased or rented from horse farms and yards. And yet, how to make a carriage for a horse with your own hands.
Features of the carriage business
To organize such a production requires a certain amount of courage. But with proper planning, a small workshop can generate a stable income.
Be sure to carefully study the demand for your products before writing a business plan. You can even discuss cooperation options with potential clients in advance. You need to be sure that you can sell horse-drawn carriages.
There are costs involved in manufacturing any product. Therefore, determine the financial reserve for the purchase of necessary materials. Calculate your profitability. It doesn’t hurt to understand the intricacies of creating carriages yourself. If you are not a pro in this, then you will need to find a master.
After this, do not forget to register your business. The IP (individual entrepreneur) form is quite suitable for you. It is clear that you will need to contact the tax office and register. You do not need to obtain any licenses or permits.
Designer piece in the shape of a carriage
Craftswomen love to decorate their home with little things that are creative and cute. Some, for example, believe that a hand-made paper carriage can serve as a box for storing tea. They even design the side wall so that it is shaped like a teapot.
Between the sides you should place a box with a lid into which the tea will be poured. You can put some little things inside this designer little thing - its use depends on the owner’s imagination.
Using the same algorithm, you can make a carriage for small dolls. True, if you do not make the wheels movable, but cut them out along with the side walls of the body, the carriage will not be able to drive like a real one. However, a child will be happy with such a toy if it is made together with him. And girls from 9 years old can already cope with such a craft themselves, decorating the carriage with ribbons, lace, braid, sequins, rhinestones, beads and beads.
We are looking for clientele
So who might be interested in your product? First on the list are travel companies. Many of them offer their clients leisurely horseback rides through historical places. Indeed, seeing the sights from a car window is boring.
But taking a ride in an old carriage is already exotic! Large firms can keep several carts in reserve at once. So the production of carriages for this category of consumers can turn into a long-term contract, especially since the wear and tear on carriages is quite intense. And you will have to repair them.
The second category of clients are agencies involved in organizing wedding celebrations. Event companies often offer newlyweds a festively decorated carriage instead of boring limousines, huge Hummers and other executive cars. It's romantic, fabulous. Which bride doesn’t dream of being in the place of the happy princess! And the photos in the album will be simply amazing.
Providing the carriage with motor function
Since you want to make a carriage with your own hands with wheels, thanks to which it will move, you should take care of this. In principle, preparing such a device is not at all difficult.
- For the wheels themselves, take something round: a spool of thin tape, wire, a lid of the required size. You can even cut a circle out of cardboard. In future wheels, a hole is made in the center if it is not provided for in advance in the used items.
- A cocktail straw is attached to the bottom of the carriage with tape.
- A wooden skewer is inserted into it.
- The edges of the skewer are strengthened in the center of the wheels.
Expanding our client base
In addition to the above clients, don't ignore the villagers. They often need chaises, carts, and carts. Finding a craftsman in the village is now quite difficult. Therefore, they will be happy to turn to you for a good-quality and reliable horse-drawn carriage, and they will also recommend you to their neighbors. Nowadays, many farmers keep horses, preferring to travel for household needs in a carriage, since this is a more economical transport than a car.
The manufacture of custom-made carriages is also in demand among collectors. But here you need to take into account that they are asking to create a copy of a specific historical thing. You will have to strictly follow the sketches, drawings, using a magnifying glass to study existing photographs or images in books. Such orders are, of course, very expensive. But they also require significant costs. At the same time, collectors ask to use original, sometimes only authentic, materials. Therefore, it will not be possible to save on consumable raw materials.
Assembling the carriage body for Barbie
- To prevent your own carriage from turning out lopsided, first calculate the middle of the bottom part and the center point of the lower curved wall. They are connected.
- Using tape, glue the edges of the bottom part and the curved line of the side at a right angle.
- Attach the second side wall in the same way.
- The remaining free ends of the bottom are twisted.
This is how the dolls, ready for a walk, fit comfortably inside the carriage.
Staff
As mentioned above, you should understand the stages of making carriages, and not only understand the technology, but also be able to work with your hands.
But even if you are an expert in this matter, you will still need help. You can produce complex, high-value orders. But apprentices are quite capable of handling the simple chaises and carts that farmers need.
This way you increase the productivity of your enterprise.
Profitable or not?
So is carriage manufacturing profitable or not? To answer this question, let's do the math. We will enter all expenses in one column.
This will include the purchase of materials, equipment, tools, building rental, and the cost of paying taxes. Let's enter our income in another column. The simplest britzka or cart costs about 5 thousand dollars. But more impressive carriages, intended for holiday or tourist trips, are much more expensive.
Here the countdown starts from 10 or 12 thousand dollars. The cost of collectibles jumps to several hundred thousand dollars. One good craftsman with experience and skillful hands is quite capable of making two or three carriages per month. So you will have a profit.
But these calculations are true only if there are potential, or better yet, regular customers. Therefore, your first priority should be the task of finding those who will need your crews.
How to build a carriage with your own hands
Now let's take a closer look at the technological aspects. Of course, modern carts are very different from their ancestors. If you make carriages exactly as they did several centuries ago, then tourists or newlyweds are unlikely to be satisfied with a ride in a horse-drawn carriage. There was quite a bit of shaking in the wooden boxes.
Therefore, modern craftsmen largely follow the automotive industry. Technologies familiar to motorists are in use here: disc brakes, shock absorbers, springs. These mechanisms make the trip more comfortable and safe.
The body is made of lightweight materials.
The general diagram of how to make a carriage looks something like this:
- the components of the future product are cut out of moisture-resistant plywood;
- Windows and doors are cut out on appropriate blanks;
- then the body is assembled (make sure that all parts are securely attached to each other);
- the racks are fastened with bolts, the shaped parts are carefully aligned;
- after the body is ready, the frame is made (a glued panel is suitable for it);
- then the driver's seat and the rear step are installed;
- the frame is ready, you need to make doors and windows;
- after that, proceed to interior and exterior decoration;
- For upholstery, use materials used in the production of upholstered furniture, a stapler.
Of course, the technology and stages may change slightly. It all depends on whether you are doing an open or closed carriage.
And the appearance can vary greatly. So, you can order very non-standard models. For example, be prepared to create a carriage in the shape of a pumpkin, just like in the Cinderella fairy tales. If you take on an order for a collector, then you need to follow all the subtleties of the technology used in a particular era. Here it will be necessary to study historical chronicles, books, and research by specialists.
Painted pumpkin carriage
To work, you need to stock up on an ordinary table and stationery knife, a glue gun, two pairs of tin lids from cans and various bright shiny paints (it is convenient to use spray bottles).
Craft materials
Cut off the top of the pumpkin.
Through the resulting hole, carefully remove all the pulp and seeds.
We take out the pulp
We cut out the door and windows.
Doors and windows
We cover the future carriage with paint. You can spray it from a can, or you can apply it with a brush.
Sprinkle fresh paint with glitter.
Sprinkle with glitter
The carriage is almost ready! Close the carriage with the lid.
Close the lid
Apply a black pattern to the lids and sprinkle with glitter.
Pattern on plastic lids
Using a glue gun, glue the lids to the pumpkin. Our carriage is on wheels!
Glue the lids
In one of the windows we place a drawing or photograph of a fairy-tale princess. Now the carriage has a passenger.
About wheels
Wheels for carriages can and should be made using modern technologies. In the city, it is not very convenient to move on asphalt on traditional wooden wheels. Most often, lightweight versions equipped with tires are used. Their ride is softer, and the horse will be less tired of pulling the cart.
Although in some cases you may be asked to make wooden wheels. But keep in mind that this process is labor-intensive. This statement is especially true for the manufacture of an axle. Therefore, many craftsmen try to purchase ready-made blanks whenever possible.
Pumpkin carriage - ideas with photos
What makes this carriage different is the elegant design of the door and windows and the wheels made of small white pumpkins.
Pumpkin carriage with pumpkin wheels
The elegant white pumpkin carriage exudes a fairy tale and a dream.
White carriage with graceful wheels
You can choose any option, the main thing is that your child likes it.
Drawing of a cart for transporting goods and riding horses
We present to your attention a drawing of a cart for transporting goods and riding horses.
Conventionally, it can be divided into several components: - axes; -frame; - mounted kit.
For the base of the load-bearing part we use a wooden beam measuring 100x100x1000mm. From below, along, along the entire length, we mill a groove for fastening the metal axle. In the center we drill a through hole with a diameter of 20mm for the kingpin (the pin around which it will rotate). From sheet metal 10mm thick we make three “pancakes” with a diameter of 300mm with a hole in the center with a diameter of 22mm, which will serve as a rotating device. We will provide mounting holes in the lower and upper “pancakes” for attaching the “pancakes” to the beam. We insert a king pin (M20x200 bolt) from the bottom of the beam. We install metal washers on both sides and tighten them with a nut with a stopper. We attach the axle and the “pancake” to the beam - the front axle of the cart is ready. When fastening, you can use wood screws or countersunk screws with nuts and washers.
We prepare the rear axle in the same way as the front axle, only without a kingpin and a “pancake”.
The basis of the frame frame is a wooden beam measuring 100x100x3000mm. On one side we attach a part of the rotating mechanism, on the other a wooden block measuring 100x100x30mm (center distance level compensator). We attach the rear axle to the frame frame. Assembling the rotating mechanism.
To give the frame the necessary rigidity, we attach boards measuring 50x130x2515mm to the sides of the beam. Having previously given them the required shape.
We assemble the bottom of the cart from boards measuring 25x100x500mm, which we fasten with wood screws to the frame frame.
Along the assembled bottom, along the edges, we fasten two boards measuring 25x100x2800mm. We cut out the ends of the cart from plywood with a thickness of 20...25mm and attach it to the frame.
We attach four boards along both ends.
We install wheels in which a metal hub with bearings is pressed. For a detailed description of the design and assembly of the wheel, see the article “Wheel drawing. Detailing, assembly diagram and design description.” We attach shafts to the front axle. We will skip the description of their design; we will not dwell on it.
The structure of the cart is assembled, it can be used in the household for transporting goods and horseback riding.
1. The angle of rotation of the front wheels during transportation depends on their diameter. The smaller its diameter, the greater the angle of rotation.
Step-by-step master class
In our work we will need: thick cardboard for draftsmen, kebab sticks, a stationery knife, a hot glue gun, wooden blocks, a screwdriver, ice cream sticks or medical spatulas, wire, screws, lace, white acrylic paint.
The template must be printed and transferred to the template. Then cut with a stationery cutter.
Let's cut out 2 parts for the carriage. To connect these parts, cut out a rectangle 14 cm long.
We glue the cardboard parts using a hot glue gun using hot glue.
Now let's create the wheels. We make them from wooden blocks, wire and kebab sticks. They will be 10 and 14 cm in diameter.
Horse cart arrangement
Consequently, if the front wheels pass under the frame of the cart, the turning angle will be more than ninety degrees. You can compensate for the difference in the center distance between the front and rear wheels with an additional wooden beam, which is installed on the front axle. 2. Turning device washers and bearings in wheel hubs must be lubricated periodically. Any lubricant can be used. 3. The overall dimensions of the structure can be taken at your discretion (usually the following dimensions are accepted: length up to 3 meters; width up to one and a half meters; height up to 1.2 meters). 4. The weight of the transported cargo will be up to 1500 kg. 5. Planed lumber must be used, preferably dry, and treated with an antiseptic. The color scheme is at your discretion.
Horse riding, using a lightweight and practical design, will bring you a lot of pleasure.
Share with your friends!
Manufacturing of carriages, horse-drawn carriages - development and restoration - Karetny Dvor Naberezhnye Chelny
Basic principles of crew design
Modularity, frame, easily removable, interchangeable wings and body, “forged” elements - cold-formed from a hollow tube (our own technology), which gives the parts volume and lightness. Example: The Cinderella carriage , consisting entirely of “curls”, weighs 330 - 400 kg. Wheels: - rims are made of U-shaped metal profile, Art. 3; - tires, in the classic version of wheels - a 60X40 rubber cord, which is bolted to each spoke. The bolt heads are sunk into the rubber cord beyond the edge of the rim.
Read more about bearings and bushings
The company producing bearings has been operating in the modified wood market for more than 10 years. During this time, extensive experience has been accumulated and a unique technology has been developed, which is significantly superior in quality and productivity to other production methods. The main products are bushings and sliding bearings made of modified wood, used in components and mechanisms with rotation speeds of up to 1000 rpm. and ambient temperatures up to 90°, on tillage machines in agriculture and on conveyors in the construction industry.
Bearings made of MD have proven themselves when working in heavy abrasive, water-abrasive and alkaline-acid environments, preventing wear of shafts and other parts working in conjunction with MD. The bearings do not require lubrication during operation, and the service life of MD bearings is 2-3 times longer compared to steel counterparts, which is confirmed by 30 years of industrial practice, numerous scientific studies and conclusions. The bearings were tested in the largest livestock farms of the Republic of Tatarstan (Sosnovoborsky pig farm, Tatarstan state farm, Vyatskie Polyany poultry farm), as well as the KAMAZ Foundry, where they received positive feedback and recommendations for use, which is reflected in the reports.
Sliding bearings with liners made of modified wood (MD) GOST 9629-81, TU 4772-001-33856354-2001, which are a substitute for 2 standard steel bearings No. 308 on manure removal conveyors, SUSG bushings made of modified wood (MD) GOST 9629-81, for oil pumps, bearing assembly with bearings made of modified wood for the heavy disc harrow BDT-7.0 - used in our crews
.
The company's specialists are ready to review free of charge and give specific recommendations on the use of MD products at your enterprise.
We will be glad if information about this activity has aroused your interest, and you will find the opportunity to notify us of your intentions for cooperation. ATTENTION . A metal ball analogue is currently being installed.
Characteristics of the materials used
Each material has its own advantages and disadvantages. For simplicity, we will evaluate each material on a three-point scale: - excellent; - Fine; - satisfactory.
Designer piece in the shape of a carriage
Craftswomen love to decorate their home with little things that are creative and cute. Some, for example, believe that a hand-made paper carriage can serve as a box for storing tea. They even design the side wall so that it is shaped like a teapot.
Between the sides you should place a box with a lid into which the tea will be poured. You can put some little things inside this designer little thing - its use depends on the owner’s imagination.
Using the same algorithm, you can make a carriage for small dolls. True, if you do not make the wheels movable, but cut them out along with the side walls of the body, the carriage will not be able to drive like a real one. However, a child will be happy with such a toy if it is made together with him. And girls from 9 years old can already cope with such a craft themselves, decorating the carriage with ribbons, lace, braid, sequins, rhinestones, beads and beads.
Making a luxury horse carriage
Carriages have long been a means of transportation for famous, wealthy people. But the time when driving carriages was the main method of moving horse-drawn vehicles is long gone. However, even in our time, unique and luxurious carriages can be seen on the streets of different cities around the world. They are used as a means of transportation by tourists, magnificent wedding processions and simply lovers of antiquity.
Horse-drawn carriages or horse carts can be purchased or rented from horse farms and yards. And yet, how to make a carriage for a horse with your own hands.
Constructing a drawing for a landau hull
The carriage described here is made from cardboard with your own hands for Barbie-type dolls. But you can make a landau or chaise in a similar way for other residents of the toy town. When constructing doll carriages with your own hands, the drawings should be developed in accordance with the size of the “users”.
- First of all, a template for the outline of the side wall of the carriage is drawn. In our case, it has the shape of a bowl with a rounded bottom or a tulip with a straight top.
- At the top of the wall there are two round windows.
- There will be a door between them. We have the function of a ladder assigned to it, so the side that will not be cut is at the bottom.
- You can make a hole in the top of the door, like a window, or on the side, like a handle.
- A sharp blade is used to cut out the outline of the wall, windows, a hole in the door and its three sides.
- The second wall is cut out in the same way, but the door is not made. Although a carriage made with your own hands from cardboard may well have two entrances.
- The bottom for the carriage is being prepared. It looks like a long strip of cardboard. This part should be as wide as the width of the carriage itself. The length is calculated in this way: the distance from the upper corner points of the side wall is measured. A measuring tape should be passed along the lower contour of the side. To this size you should add an allowance for circular folds - decorations along the top of the carriage.
Stages of work
Once all materials have been purchased, sales can begin. Next, let's look at how to make a carriage for a horse step by step:
- It is best to take sheets of plywood with a thickness of at least 9mm as the basis for the future carriage. Plywood is quite durable and easy to process. Please note that the plywood must be moisture resistant, since the carriage will be used in outdoor conditions. Start by marking the workpiece according to previously prepared drawings. First you need to mark the sides. Divide the plywood sheet into pieces using a circular saw for ease of work.
Placement of outlines
- Draw the exact outlines of the components onto the plywood. Mark the places where window, door openings and possible technical grooves will be located. Then you can start cutting out the parts. It is most convenient to cut them with a jigsaw or its manual equivalent; to insert its attachment into the plywood, you need to drill holes using a drill.
Cutting blanks
- Two small pieces of plywood need to be cut in half in order to make blanks for the carriage walls. The resulting blanks must be glued with glue. Both parts must be thoroughly lubricated with glue, allowed to dry a little, and then tightened with clamps.
- After the side walls are completely dry, attach the bottom and ceiling of the carriage to them. Please note that the bottom, for greater strength, must be made of thicker plywood, and if the carriage is large, then it is necessary to use additional stiffeners made of wooden beams or a metal profile.
Gluing the bottom and ceiling
- To attach the bottom and ceiling to the walls, you can use steel corners or racks made of wooden beams. The racks must be made in such a way that they rest on the edges of the rear and front walls. It is best to fasten the racks to the walls with bolts or self-tapping screws, having previously made holes for them.
- Next you need to make the front and back parts of the carriage. Their dimensions must be identical to the dimensions between the sidewalls and the height from the bottom to the roof of the carriage. Do not forget also that there should be a place in front where the coachman should sit. If desired, you can also make window openings in the front and back. After fastening all the components together, the body is ready, let's move on to the frame.
- In order to make a frame, it is best to take a wooden board. Draw the frame drawings on the shield and cut it out with a jigsaw or manually with a hacksaw. The corners of the frame must be processed with a file, and then sanded clean with fine sandpaper. When designing the frame, do not forget about the place where the coachman will sit, in the front, and about the place where you can put luggage in the back of the carriage.
- Now move on to the windows and doors. To install windows and doors, you need to cover the openings with plastic, and hang curtains on the doorway. You can make plastic grilles for windows and doors, and then glue them into the openings.
Plastic upholstery
- The seats can be made from fiberboard or leftover plywood. Seat upholstery should be made of thick fabric or leather. Foam cushions should be placed on the seats in order to smooth out vibrations from road unevenness. Nail the upholstery fabric to the base of the seats using a staple gun.
Sofa upholstery
- The wheels can be made from a laminated wooden panel; cut it into four pieces. Cut out blanks of the required size from the blanks, note that the front wheels are usually smaller than the rear ones, and then cut spokes and holes for the axles in the circles. Select the axles under the wheels and press them into the hubs, securing them with bolts.
Rotary mechanism with axis
- Attach the wheels to the frame and the body to the frame. The body is attached with bolts and glue for greater strength.
- After final assembly, sand the entire surface of the carriage with fine sandpaper. Painting is done in two or three layers, after which it is covered with at least two layers of varnish. Decorative finishing is carried out using velvet, leather and gilding.
Now you know how to make a carriage for a horse yourself, good luck with your making.
We make a carriage from flowers in a step-by-step lesson with a description
To make a flower carriage you will need:
- double and single core wire;
- skewers;
- black corrugated paper;
- penoplex;
- PVA glue;
- glue gun;
- black electrical tape;
- Ruler and pencil;
- wire;
- wire cutters;
- scissors;
- scotch;
- stationery knife.
We make wheels; to do this, we cut four sections from double-core wire: two 28 cm each and two 40 cm each. We bend the resulting sections into the shape of a circle. We fasten the resulting wheels with tape. We cut strips from black corrugated paper and wrap them. Glue the tip of the paper.
From penoplex we cut out a circle with a diameter of two cm. We cut the skewers into sticks 4 cm long and make the spokes of the wheels. We thread the finished knitting needles into the penoplex, having previously lubricated them with glue for better fixation. We connect three skewers with tape and wrap them with corrugation - this is the wheel shaft.
We make a base from two-core wire with rounded ends and wrap it with corrugated paper.
We are making a cabin. To do this, cut five pieces of 55 cm each from single-core wire, wrap each with black electrical tape and dilute it with gold tape. We cut circles of polystyrene foam to fasten the rods. Using an awl and a glue gun, we make a carriage skirt. We collect all the parts and secure them with electrical tape. We hide the tips of the skewers on wheels with beads.
The carriage is almost ready, all that remains is to decorate it. To do this, we cut corrugated petals and create a flower base. To make petals, you need to cut out rectangles of the same size and cut out petals from them. Having made the blanks, you need to use the blunt end of the scissors to draw the wave away from you and stretch the segment, giving it the shape of a petal. Then glue all the petals with hot glue to the foam base. We install the resulting flower into the body.
Arzamas craftsman made a real carriage
A resident of Arzamas, Pyotr Zhivtsov, created the luxurious carriage with his own hands. I had to master many specialties, from blacksmith to livestock breeder and groom. The crew of the century before last received some parts from a not very successful modern vehicle.
Report by Yuri Chukhin.
“Madam, allow me your hand,” - black tailcoat, white tie, high top hat - the driver with the air of an aristocrat invites the young ladies for a horse ride. And let the cars hum somewhere nearby - a leisurely ride in a carriage is like traveling in a time machine.
Alena Antonova, carriage carriage passenger: “I feel as if I’m a princess, going to a ball to charm some prince. It’s romantic here, especially if there was a young man nearby, it would be wonderful.”
Dear coachman - Pyotr Zhivtsov. On weekends, he takes city residents for rides in a carriage he created with his own hands. Children are especially delighted. And the owner himself, no, no, and it will hurt his heart. No matter how I dreamed about this for eighteen years. I became imbued with the romance of a noble estate even when I worked as a restorer at Pushkin’s Boldino estate.
Pyotr Zhivtsov: “I was a blacksmith there, and we worked in Boldino, where Pushkin’s places are, for horses, feeders, stables, hinges, handles. And I had this idea: this is for Boldin, but shouldn’t I try to make a carriage for me?”
We had to start from scratch. “Build the carriage yourself” instructions are nowhere to be found. The blacksmith had to master the skills of a carpenter, a welder, and even become a design engineer.
Peter Zhivtsov, showing drawings in the workshop: “I had to think, draw, and repeatedly throw it all into the trash. We had to find some kind of dynamics.”
Putting the almost finished carriage on wheels turned out to be the most difficult task. An old, broken Moskvich, which had been rusting idle in the garage for a long time, came to the rescue.
Pyotr Zhivtsov points to the wheels and springs of the carriage: “I made everything in detail with my own hands. Here we had to take machine parts as well. Springs from Moskvich, which were remade, and from Moskvich - hubs, which were made into carriage wheels.”
At first, Pyotr Zhivtsov received a lot of reproaches from his wife. But soon Lyubov Borisovna herself became “infected” with her husband’s hobby. The lovingly selected fabric in the upholstery and the openwork curtains on the windows are her handiwork.
Lyubov Zhivtsova: “The drawings, the hardware that was brought home - naturally, every housewife would not like all this, but then I got involved with it. I was interested in all this and I also began to help him.”
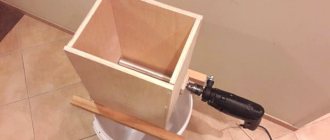
Providing the carriage with motor function
Since you want to make a carriage with your own hands with wheels, thanks to which it will move, you should take care of this. In principle, preparing such a device is not at all difficult.
- For the wheels themselves, take something round: a spool of thin tape, wire, a lid of the required size. You can even cut a circle out of cardboard. In future wheels, a hole is made in the center if it is not provided for in advance in the used items.
- A cocktail straw is attached to the bottom of the carriage with tape.
- A wooden skewer is inserted into it.
- The edges of the skewer are strengthened in the center of the wheels.
Table souvenir in the form of a carriage
Often the craft is used as decoration. This master class will tell you how to make a carriage out of paper with your own hands.
- First, a template for the side wall of the housing is developed. You can draw only half of the template, and cut out the entire part at once by folding the paper in half - both sides are asymmetrical. For this craft you will need two walls.
- The window openings on the inside are covered with fine tulle. The outline of a person is attached to a piece of thick cardboard, the other side of which is glued directly to the wall part from the inside.
- You can decorate the outer side of the case wall with beads, rhinestones, sequins, and glue the handle to the door.
- A matchbox covered with white paper is glued between both parts of the body.
- Figures of servants and a coachman are attached to it at the back and front.
- The carriage is mounted on wheels. These can be metal buttons or circles cut out of cardboard and covered with foil.
- Horse figures are cut out of cardboard and placed in front. They are attached to the craft with thick wire. You can cut out narrow strips from cardboard that will imitate a horse harness.
CARD PLAYER. Cardboard photo zone
Cardboard decorations for photo shoots!
Cardboard decorations are unusual and exclusive! They allow you to turn into a princess in a few seconds, find yourself in the land of Giants, and try on any outfit. Show in full... In general, as long as your imagination is enough, our cardboard and the ability to create unforgettable pictures on it will be enough! Write, call - we will cut and color it so that you will believe what you see!
To contact us for all questions: personal messages or phone/viber/WhatsApp
8 922 052 2000 Nina
We are from Tyumen, but we ship anywhere in the country
This lesson will appeal to both children and adults. You can easily create such a beautiful carriage from cardboard.
We will need:
- cardboard; - plasticine; - self-adhesive; — self-adhesive rubber; - scissors.
From the sales box, cut out two sides of the body using a stencil.
Then cut out 4 more parts and cover them with white self-adhesive tape. Still, the boxes may be uneven, and this way we will hide all the unevenness.
Coat the window openings with plasticine.
Cut a strip that will include the front wall. Tape the bottom of the side walls with double-sided tape.
Connect all the parts together. This is what you should end up with. The future carriage is already recognizable in the blank.
Next, cut out a piece from cardboard as shown in the photo. And also 2 parts made of white self-adhesive rubber; cover the cardboard part with rubber. Make two identical parts.
Connect the previous two pieces with an additional piece of cardboard.
Place a cardboard body on these parts and glue the trunk box to the back.
Also cut out the wheels from cardboard. Make two wheels for each wheel, gluing them together for evenness.
These are the wheels you should get; it’s better to cut them out with a stationery knife.
Make tires from self-adhesive rubber.
Now make a blank for the coachman's seat.
When finished, the seat should look something like this (you can improve it if you wish). Also make two sides to it.
Cover the sides with self-adhesive tape and the seat with rubber.
Now make the front rotating axle. To do this, glue the box together, make a slot in the center, insert a paper tube into it, and secure it with a cardboard ring on top. Now seal the box completely.
Connect the box with the second one (it should be smaller!).
Secure it with a ring at the bottom like this.
Glue the parts for the axle on the sides.
Now comes the fun part: put on the wheels, lock them, trim off the extra long axle.
As you can see, the rear axle is smaller, since the wheels are large.
And here is the coachman's seat.
The seats need to be made into the carriage itself. But it’s better to first make a floor there from several layers of thick cardboard. Draw any doors you want.
As everyone knows, a gift made with your own hands is the most unique and original. Besides, how nice it is to give something that has a piece of your soul in it. And how shocked the person to whom such a gift is intended will be. There are a lot of different crafts on the Internet for every taste and color. And so you decided for yourself that a carriage made quickly and easily with your own hands would be just such a gift.
The carriage can not only be given as a gift, but also used as a decoration for a festive table or interior. It is not only original, but also functional. It can be used as a vase, box, flashlight or simply as a toy for a child. So what types of carriage crafts are there? The most popular ones include carriages made of felt, plywood, wood, cardboard, paper, wire and pumpkin. The most spectacular gift will be a carriage with flowers. You can make flowers for such a carriage yourself or decorate it with fresh flowers. Below we will conduct several master classes with photo and video instructions.