Choosing a base
Today, you can make a carnival mask with your own hands in literally half an hour from the following materials:
- textile;
- cardboard;
- plastic.
To do it yourself, it is advisable to use a workpiece.
Preparing a universal template
So that when wearing a mask made of felt or other material does not cause inconvenience, it is important that it is comfortable. It is important to make it taking into account the parameters of the face.
Measure the distance between the baby's temples and the centers of the pupils. Draw on a draft, taking into account the measured values, the contours of the future accessory. During preparation, it is important to take into account the fact that if you decide to create a New Year's mask with your own hands for children and adults, it will only have to cover the face to the cheeks.
Its lower edge should be higher than the tip of the nose.
On the sides, the product can be made in any shape. After this, the gaps intended for the pupils are cut out. They can be made curved or classic round. On each side, using a thick needle, be sure to pierce small gaps. They will be used for elastic bands and ties.
You can build a product that will be attached to a stick. In this case, it is better to consider various ways to make a mask from cardboard, since it is worn exclusively in the hand, it should be quite light. They are mainly bought for parties, special events, balls, and are not recommended for preschoolers.
Patterns and templates of New Year's masks in the form of a Bull and more
All of the mask options described above are made entirely with your own hands - patterns are drawn, parts are cut out, etc. But, if you don’t have much time—literally one evening—you can use ready-made templates that will help you create a mask in a matter of minutes.
Procedure:
- Download one of the templates below.
- Print the picture.
- Cut a strip of paper/cardboard of the appropriate length (according to the volume of the head) and glue it to the mask. Or cut a piece of elastic and sew it in the right places.
On a note! The Bull Mask can be made from papier-mâché. The basis is an artificial bull's face, which is pasted over with pieces of paper dipped in paste. In this way you can make a Bull's head that imitates the original as much as possible.
A DIY bull mask for the New Year is an excellent solution that will allow you to quickly prepare for holiday events without wasting extra time. In the pre-New Year bustle, time is worth its weight in gold, so make masks and go to the skating rink, play snowballs, ride snowmobiles - you never know how much fun there is in winter.
How to build an accessory: step-by-step instructions
- Take a sheet, fold it in half;
- Draw the boundaries;
- Cut out the shape, cut through the pupils;
- Make holes to insert elastic;
- Draw with felt-tip pens, then glue mustaches, horns, nose for a fox mask onto the head, or any animal.
Thanks to such simple instructions, even a person who has not done anything like this can make a DIY wolf mask of any wild or domestic animal. To do this, you don’t have to buy expensive tools and materials. People raising children have everything at home.
Face painting
Children love face painting, but this way of dressing up for a carnival is also suitable for adults. To do this, you will need special face paints that will not cause allergies and will not “bleed.” The main shades are white, black, pink and brown. First, draw a contour, outlining the nostrils, ears and horns. The nostrils and lips will occupy the space from the nose to the mouth. This part is painted pink and white. The horns and forelock marked on the forehead are filled with the same paint. The ears and main part are painted brown.
Girls will love the white and black design. This can be either a whole mask or decorating only the eye area.
Recommendations
- Before you decide to make a craft, look at the options and choose the one that suits you best.
- If the product is not being prepared for some event, try to come up with something original, do not depict animals or people.
- You don’t have to buy the usual cardboard to make this craft. You can try preparing it from felt/plastic. It will definitely last longer.
Giraffe mask
Now the Giraffe mask - how can it be without exoticism? We will make the giraffe wider cheeks and an extended nose, and add characteristic small horns. It is clear that it is also necessary to convey the appropriate coloring. Draw the spots on the mask with a marker or gouache. But I warn you about gouache: it smudges. It must be coated with a layer of PVA or varnish. Or you can stick on multi-colored spots made of paper or self-adhesive film. The mask will be quite recognizable even without the increased length of the neck.
So, who else are we missing? Who is not yet grazing in our herd? ABOUT ! - Far, far away in the meadow. They forgot the cow.
Baby bear at a matinee
The bear is one of the most common characters in films and fairy tales. It is popular when creating original masks for children. It is the accessory in the form of it that parents have to make. If you have never made masks with animal images and don’t know how they are created, then you can use simple cardboard as a blank. Draw the outline of the animal's face.
Don't forget to build a special hole for the nose.
Cut the base from absolutely any material. The measurements that were taken will be needed for further work. Next, additional holes are cut right next to the nose. Ideally they should be oval shaped. Be sure to stick small colored circles in the middle of the ears. Paper of the same shade should be used for the bottom of the bear mask. All components are glued onto cardboard. The holiday accessory can be used.
Mask made of foam rubber and plastic bottle
Children love not only to participate in masquerade, but also to watch a puppet theater, where the main characters are masked dolls. You can make such a character at home. It will take a little time to make a cow from foam rubber.
Materials:
- plastic bottle 1.5 l;
- foam;
- needle;
- thread;
- glue gun;
- textile;
- buttons;
- padding polyester
Step-by-step instruction:
- Prepare a bottle and padding polyester in the shape of a square. Sew these components to each other.
- Put nylon on top of the resulting structure, tie it into a knot above the neck, and cut off the rest.
- Roll two balls out of foam rubber - these will be the cheeks.
- Roll up a roller from the same material - this is a beard.
- Insert two balls into the nylon and place a roller between them. This is the muzzle.
- Untie the knot, insert the padding polyester, and then tie the knot again. The frontal lobe is ready.
- At the location of the roller, make a fold and sew to create a lower lip.
- Cut out a small oval from foam rubber for the animal's muzzle. Wrap it with synthetic padding, then attach the workpiece to the nylon and cut along its contour so that a small allowance remains. Sew along it, put foam rubber with padding polyester inside and tighten the thread.
- Make marks for the nostrils on the muzzle and sew them.
- Also make hooves and ears. Fill the ears with padding polyester.
- Sew on the muzzle and ears.
- Place marks for the eyes on the head, use a needle and thread to make small depressions in the eye sockets and glue the eyes.
- Sew eyebrows.
- Attach bangs to the forehead.
- Glue the foam antlers with a glue gun.
Attention! To prevent the padding polyester from falling out of the blanks, it must be tied with threads.
At the last stage, cut off the bottom of the bottle so that you can stick your hand through. The bull for the home puppet theater is ready.
How to make a felt mouse mask or a hedgehog mask?
To make it in the form of a mouse, it is necessary, as in the cases listed above, to take measurements of the face using the simplest centimeter. Then all the data is transferred to paper, which will be used as a template for the rat mask.
Next, the stencil is applied to cardboard in gray tones and outlined with a simple pencil. All that remains is to cut out the base and understand how to draw a mask: the animal’s muzzle, mustache, ears. The details are carefully cut out so that the craft pleases the baby. Holes for the eyes will help complete the look.
Note!
- Do-it-yourself owl - how to sew an owl, an owlet, an owl silhouette from fabric. Simple ways to create crafts
- Autumn crafts for the autumn holiday from leaves, fesalis, plasticine, vegetables - come up with a creative name, create masterpieces
What craft materials to use for creativity: non-traditional, foamed, soft or natural pieces made by yourself
Goat mask
(and another goat mask model HERE)
And let's draw the facial features:
We do it according to the same scheme as the horse one - we glue the darts on the forehead and on the nose - that’s it! There is a basis. Only the details differ - horns are added, plus the shape of the ears changes. For fun, you can add blush and eyelashes. In essence, you can make a wolf using the same scheme - the kids will not be able to distinguish their own mother. But, God bless him, everything has its time, and we don’t even have kids yet. Let's shorten the nose of the pattern a little, make the horns small and not sharp - and there you have it.
Bunny for the New Year's holiday
A hare mask is the most popular accessory for a child’s costume in school and kindergarten. Any mother wants her children to be the most beautiful during the matinee. Therefore, a sparrow mask or a frog mask is in little demand and is of little interest to anyone, except in rare cases when they are made to take part in some theatrical performance.
Let us dwell in detail on how to make a cute eared animal. If you feel artistic potential, it’s easy to draw any face yourself.
Otherwise, print out a ready-made template from the Internet, where there are even blanks for a penguin mask.
After the bunny blank is ready, carefully cut out the resulting muzzle.
The next stage of creation is taking measurements. When you measure the distance from one baby's eye to the other, you can cut holes of the required size. To add personality to the look, lightly decorate the eared one. This is easy to do by rolling finely cut pieces of blue and pink napkins into balls. The blue blank can be glued to the top of the craft, pink mini-balls - right in the center of the hare's ears. Fastening occurs in any convenient way: with tape, elastic band, hoop.
"Dramateshka" is the largest archive of children's plays in RuNet
Page 17 of 29
You should find the option of constructing hat masks for such characters of the animal world as artiodactyls interesting; these are the “Cow”, “Deer” and “Horse” masks. The defining features of these masks are the elongated muzzle with characteristic nostrils, horns of various configurations or a mane. To make a mask, you will need the following materials and tools: A sheet of foam rubber 1.5-2 cm thick with an area of at least 1.5 m2; glue "Moment-1"; scissors; tailor's "meter"; watercolor pencil. Step 1. The base cap is made in the usual way (see Fig. 5), with the difference that the height of the cut out rectangular part is slightly larger - not 20, but 25 cm. Step 2. To make the cow's muzzle, cut out a shape resembling a trapezoid from a sheet of foam rubber , - a quadrangle without right angles (Fig. 27, a), in which the sides are 22-24 cm, the base is 45 cm, the top side of the part is 40 cm.
We coat the ends of the sides with glue and, after letting the glue dry for 5-10 minutes, connect them together. The result was the shape of a truncated cone (Fig. 27, b). Now take the cone so that its seam is at the bottom, and wrap the fingers of both hands around the narrow base at the top and bottom (Fig. 27, c). The left palm is at the bottom, and the seam of the piece is located between the thumb and forefinger. Now, with your index finger, grab the bottom edge of the hole and bend it inside the part to a depth of 5 cm. Without letting go of this bend, with your right hand - from above exactly opposite the bottom seam - also bend the upper 5 cm of the top edge, but do not tuck it in, but overlap it lower bend (Fig. 27, d). Coat the end of the upper overlap with glue and fix it in this position. On the sides of the overlap, characteristic protuberances—nostrils—formed. Now the stage of internal gluing. Apply a little glue, shade like a pencil - on top of the inside of the cone, as shown by the crosses in Fig. 27, d. And on the outside, in the places “behind the nostrils,” lightly massage the part with your fingers (Fig. 27, e). Let the “stained” planes inside dry for 15-20 minutes and squeeze these places again for a few seconds - the nostrils will appear more accurately and prominently. We make the lower lip according to the “nostril” part (the lower lip should not be longer than the upper). Let's cut a rectangle from a sheet of foam rubber with a length slightly less than the length of the main part (measured with a tailor's "meter" on the finished part) and a height of 10 cm. We coat one end of the short side with glue and, turning it 4-5 cm, glue it to the plane of the part (Fig. 28, A). The result is a rectangle with a “sausage” at the end. Round the opposite edge with scissors (Fig. 28, b). We coat the ends of the rectangle with glue (Fig. 28, b), bend it with a groove (Fig. 28, c) and glue the parts with the nostrils to the bottom (Fig. 28, d). The muzzle design is almost ready. We coat the ends of the underside of the muzzle with glue and attach it to the base cap, departing 10-12 cm from the top of the head - the place for the character’s forehead. Let me remind you that in this case you need to use the seam of the cap as an axis of symmetry (Fig. 28, d).
Step 3. Eyebrows. In order not to disturb the proportions of the character's face, we will first create the eyebrows. Cut out two semicircular visors from foam rubber, 18 cm long and 4-5 cm wide. Having coated the ends of the flat side, glue them in a semicircle on both sides of the muzzle above the place of the future eyes (Fig. 28, f). Step 4. Cheeks are made similarly to the previous masks. Cut two circles with a diameter of 12-14 cm from a sheet of foam rubber. Using a tube of glue like a pencil, draw cheek projections with a diameter of about 10-11 cm on both sides of the muzzle. Coat the ends of the circles with glue and glue them into the circles drawn on the muzzle (for a detailed description, see the mask "Fox", "Hedgehog"). Start gluing from the nose and then up in a circle. Press the excess formed in the area of the lower jaw inside the cheek (Fig. 28, f). Glue the second cheek in the same way. Step 5. Cow horns. Let's cut out two right-angled triangles from foam rubber with a base of 15 cm and a straight side length of 25 cm. Apply glue to the ends of the sides of the triangle and, after allowing to dry for 5-10 minutes, connect them together. We got long cones, let’s “bend” them using 3-4 shallow darts. To do this, make cuts on the side of the seam 1.5 cm wide, departing 10 cm from the base. (“The steepness” of the horns depends on the frequency and depth of the darts.). Lubricate the ends of the darts with glue and connect them (Fig. 21, e). The horns are ready. Now all that remains is to glue them to the base cap. Mark with a pencil the places for gluing the horns - on the crown, behind the eyebrows - and, having coated the ends of the horns with glue, glue them to the marked places so that their bent ends are directed towards the center of the crown. Step 6. Ears. Cut out two rectangular triangles from foam rubber with a base of 10 cm and a height of the straight side of 12 cm, and slightly round the third side with scissors. We coat the bases of the triangles with glue and, bending the base in half (to form the auricle), glue the ears to the temporal parts of the cap, just below the horns so that the ears “look” down. Note. The size of the ears can be changed up or down according to the size of the performer's head. Decoration can be done according to your wishes (see photo). A cow’s bangs, braid or “short haircut” can be made from cut strips of foam rubber, braided (braided) in the required manner. Paint in brownish-brown tones, starting from the back of the head, leaving the front of the muzzle and cheeks lighter.
- << Back
- Forward >>
Volume craft: what is it?
If you want to make a believable nutcracker mask for your child to participate in a kindergarten’s New Year’s production, you can opt for a three-dimensional product. Building it is more difficult than any other cardboard thing; you should prepare for the process in advance and be patient. Without perseverance nothing will happen.
A real nutcracker with your own hands:
- Fold the A4 sheet exactly in half, repeat the steps twice, namely in width and then in length.
- From the intersection of the formed folds at a distance of a couple of centimeters in each direction, cut out the outline where the hero’s eyes will be.
To ensure that the slots fit your baby, take the required measurements first.
- To make the craft truly voluminous, you need to make a couple of cuts: in the area of the temples, eyebrows, and in the lower part of the nose.
- Bend the workpiece and use a stapler to staple it a few millimeters between the holes cut for the eyes on the inside.
- Make small 50 mm cuts directly on the forehead and glue them together.
- Carefully widen the cuts made at the temples and glue small triangles there.
- All that remains is to secure everything with tape or any other available means.
Children love to do various crafts with their parents. Offer to make a mask of an owl or any cartoon character together and see how proud and happy they will be during the event, performing in a product that they came up with themselves. Everyone knows about the benefits of joint activities with preschool children!
So it's time to learn how to make a mask at home. This will allow you to diversify the evenings with an interesting activity, to get to know the child better, his desires, and dreams. Perhaps while working on a craft, he will share thoughts and ideas that will provide an opportunity to take a completely new look at the youngest member of the family.
Bull mask made from disposable tableware
Another non-standard version of the product is made from disposable tableware. It is enough to show a little imagination and the New Year's image will be ready.
Materials:
- white cardboard;
- plastic plate;
- black, pink and brown felt-tip pen;
- brown gouache;
- glue;
- stationery knife;
- ruler.
Attention! Felt-tip pens can be replaced with paints, crayons, and pencils.
Step-by-step instruction:
- Place a plastic plate on your face, measure the eye area and circle the glue cap in these places. Cut holes using a utility knife.
- Paint the blank with brown gouache.
- Cut out a muzzle, 2 horns, 2 ears and a forelock from cardboard.
- Color these elements with appropriate colors.
- Glue the face, ears, and horns on the front side.
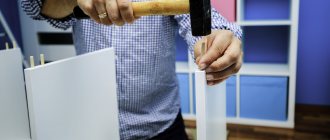
- Glue a ruler - it will act as a handle.
Attention! For this purpose, it is better to use tape, since glue will not be able to securely fix a wooden or plastic ruler.
How to make a mask - photo ideas for any holiday
Please repost
0