The issue of mole control is very relevant for summer residents. These seemingly harmless creatures can cause great harm to the garden and the products grown in it. Therefore, many are wondering how to solve this problem. Despite the mass of anti-mole remedies and devices in the city, there is one simple option that everyone can afford.
You don't need to be a skilled craftsman to create this product, and the whole job will take about 20 minutes. Intrigued? Then let's find out how to make a mole repeller from a plastic bottle.
Looking for solutions
There are a lot of requests on the Internet regarding the topic of rodent control, especially moles. Everyone wants to make sure they don't have to deal with this problem anymore. However, not everyone knows how to act in this case. Killing animals is not entirely humane, so poisons and other killing devices will not work. Often gardeners run to the store to ask for advice or buy an effective and at the same time inexpensive product. Others take a simpler path, making a mole repeller with their own hands.
But how can a plastic bottle repel moles? It's simple. All you have to do is upgrade it by constructing unique blades from a bottle that will make it spin. While rotating, the turntable will make noise. The design is quite simple:
- Plastic bottle.
- Stick.
That's all you need. The container is placed on a stick or rod, after which it will spin under the influence of the wind. Due to the fact that the rod is buried in the ground, vibration and noise repel moles. You can make many such products for the garden, the cost of which is simply meager. And most importantly, you don't have to spend a lot of time. Let's look at the instructions on how to create this simple miracle of technology.
Shovel against pests - a simple way to control
The fight against moles in the garden does not always involve spending on newfangled products and traps. You can try to solve the problem with a simple shovel. The method is not the most humane and is suitable for those who intend not just to catch, but to take the life of each member of the family.
This means that you need to use a shovel as carefully as possible, moving along the furrows of the dug tunnel
It is important to choose the time when moles go hunting for worms and insects. Usually this is morning, lunch and evening
Moving along the furrows, you can notice that they are becoming longer, which means that the mole is in the area of study of the site and is busy working. At such a moment, maintaining composure, you need to block the mole’s path with shovels from both sides. In surprise, the animal will either hit their surface and die, or require additional human intervention (you can use a hammer to stun).
It is worth remembering that there are many moles, which will make catching them much more difficult.
What you need for work
The advantage of a plastic bottle repeller is that you will need a minimum set of tools and materials. Anyone can work with them, and purchasing them is not a problem at all. You can see this for yourself. Here's a list of everything you'll need:
- plastic bottle;
- steel rod or wooden stick;
- stationery knife or scissors;
- drill with a drill (in some cases this is not required).
That's the whole set. Are you surprised? It’s not worth it, because for all its simplicity, the mechanism works flawlessly. You just need to connect it all into one device.
Note! The device is automatic, but only works from the wind. In calm, windless weather it will simply be useless.
Additional tips and tricks
- The key to the success of homemade models is their number - the more repellers you place on the site, the sooner the moles will leave it. It would be useful to combine different types and types of homemade “scarecrows”;
- Most repellers are quite noisy. Decide in advance whether you can tolerate constant noise and crackling on the site. If the answer is no, pay attention to ultrasonic devices;
- If moles have been settling on your site for several years, you should worry about protection in advance - in April-early May you can already install several “rattlers”. Mammals will most likely avoid the unpleasant territory without having time to settle underground.
Moles are cute underground inhabitants (All about moles - description, habitat, types and features, read more in the article here), which actually do not harm crops and soil fertility, however, they still need to be gotten rid of. First of all, you should decide for yourself whether you want to spend money on factory devices or install the mechanisms yourself, sacrificing the appearance of the site.
Step-by-step instructions for creating a mole repeller
So, when you have everything you need, you can get started. The bottle can be of any color, shape, volume... This is not so important. Provide yourself with a comfortable place to work. It is better to do everything at a table on a flat surface. Then no problems will arise. The instructions are as follows:
That's all, the device is ready. Now you just need to find the mole's tunnel in order to insert the rod into it. Due to the vibration and sound transmitted from the bottle along the rod into the ground, moles will not approach this place. They are afraid of such aggressive noises. If you have a large garden, then make several structures to prevent moles from appearing in another part of the garden.
Advice! Such a repeller will act not only on moles. Birds and other rodents are also very afraid of such noise. Therefore, you do not have to fear that our smaller brothers will devour your harvest.
It is one of the noise repellents for moles.
DIY spinner made from plastic bottles
We make a pinwheel from moles. To make it, we will use the most available materials that are likely to be found on everyone’s household.
The first step is to prepare the rotation axis. In my case, I used an old welding electrode. It is not suitable for welding work, but it is very convenient to use it for our purposes.
Step one. Removing the coating
To remove the coating from the electrode, it is enough to give it a few light blows with a hammer. The coating will crack and chip. You can remove cracked coating with your hands or pliers.
Step two. Hole in the lid.
I used a cordless drill to make a hole in the lid. But it is not at all difficult to do with the help of an ordinary knife with a sharp end. The diameter of the hole should be such that our previously prepared axle easily passes through it, but does not dangle.
Step three: hole in the bottom.
In the same way, using a drill or knife, we make a hole in the bottom of the bottle. The hole diameter is the same.
Step four. We focus
The remaining electrode coating does not bother us. But as the bottle rotates, if the cap rubs against the remaining layer, its rotation will slow down greatly. Therefore, we will make a ring of copper wire around our axis. It will prevent the bottle from falling lower and will make it easier to rotate.
Step five. Bottle marking
Using a felt-tip pen or marker, divide the surface of the bottle into an even number of sectors. For a spinner with three blades, divide it into six sectors; if you want to make a spinner with four blades, then divide it into eight sectors.
Step six. cut out the blades.
Using a sharp knife or scissors, cut out the marked sectors according to the markings. As you can see from the photo, a stationery knife is well suited for this purpose.
Having made the U-shaped cuts, we begin to bend the blades. After we complete this step, our pinwheel will look like this.
Now all we have to do is assemble the turntable by threading the axle through the holes in the lid and bottom.
The finished pinwheel, assembled and stuck into the ground, looks like this.
And now a small breeze is enough for the bottle to start rotating. When rotating, the vibration from the oscillations of the bottle is transmitted to the ground and the moles begin to feel not very comfortable. And as a result, they leave the area that has become uncomfortable for them.
This is how the master class on making a mole repellent turntable turned out.
The mole looks like a cute, harmless animal, but it can cause destructive damage to a planted plot of land. The mole lives underground and, breaking through tunnels, harms the root system of plants.
Ways to combat moles are as follows:
- Ultrasonic repellers;
- Poisoned with food;
- The holes where the mole comes out are filled in.
Some gardeners use homemade traps. How to make a mole repeller
yourself and which of them are more effective is described in this article.
Alarm clocks
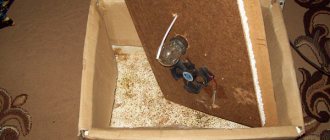
It is very easy to make a mole repeller from ordinary cheap battery-powered alarm clocks. Alarm clocks are set at different times to ring and the clocks are placed in jars with screw-on lids. The lids are sealed and the jars are buried in different places in the garden. Moles cannot stand the sounds of the alarm clock constantly coming from underground and leave the area.
The second option with an alarm clock: place it in a half-meter pipe, buried vertically. Holes are drilled in the bottom of the pipe for better sound distribution. This is what the pipe looks like.
The alarm clock is attached to a wire so that it can be easily reached.
Of all the mole repellers, alarm clocks are one of the most effective methods. The only better repeller is a radio and speakers, but this type requires special knowledge.
Types of repellent devices
All repellers, even homemade ones, are divided into 4 types:
- Mechanical. They are effective because their parts, when moving, create noise and vibration that scare away the animal;
- Biological - capsules containing aromatic oils. Pests cannot tolerate their smell. This group also includes plants whose smell cannot be tolerated by moles;
- Electronic mole repellers.
They are usually vibrating, powered or battery operated; - Ultrasonic. They repel small pests by emitting frequency sound waves. When they hit the ground, such sounds send a signal of danger to the animal’s brain.
Although the modern market offers a huge number of mole repellent devices to choose from, homemade devices also enjoy considerable success. If you use homemade repellers in a comprehensive manner in the fight against pests, then the land area can be completely cleared of annoying animals.
Watch the video! DIY mole repeller
The principle of operation of the control method
Moles themselves are not pests for vegetable gardens. They do not eat the root system or fruits of plants. Rather, on the contrary, they destroy most of the harmful underground parasites, since they are the main diet of these animals. But moles dig numerous underground passages, which is why unpresentable strips of earth appear on the surface of the earth. Also, due to digging, the roots of plantings can be damaged.
You can get rid of a mole in different ways. Garden stores offer many electronic repellers based on the principle of ultrasonic waves - they are inaudible to humans due to their high frequency, but extremely unpleasant to animals (mice, rats and other rodents are driven out of the area in the same way). However, such devices are quite expensive and consume a large amount of energy.
A good alternative would be to make a device such as a mole repeller. Most of the “folk” methods are extremely inexpensive to implement. Of course, they are inferior in efficiency to ultrasonic ones, but in this case you have to choose between speed and savings.
How to make a mole repeller from a plastic bottle
A plastic bottle is an indispensable universal item used to create various devices in the garden. It can be used to make an excellent weapon against moles, the so-called windmill.
Method No. 1
To make a windmill from a plastic bottle
necessary:
- large scissors;
- plastic container 1.5 l;
- permanent marker;
- awl;
- stationery knife;
- self-tapping screw;
- metal plates with a hole in the middle (washers);
- strong stalk.
The manufacturing process itself consists of the following steps:
- Use a permanent marker to make a mark on the bottom of the plastic bottle. Draw a strip just above the bottom along the lower border;
- Using a stationery knife, cut off the figured bottom of the bottle along the drawn strip;
- In order for the spinner to rotate in a clockwise direction, you must correctly mark the bottom of the bottle. First, draw a line with a marker and draw it from the center of the bottom of the bottle to the center of any of the convex irregularities. Next, draw a line that goes from the center of the bottom and ends in the concave part. And thus we place markings along the entire bottom.
- Use large sharp scissors to cut out unnecessary elements. The result is a device in the form of a propeller. We cut out the first element and then cut through one after another.
- 5 such parts should be removed;
- In the resulting bottom, we pierce a hole in the center with an awl heated on the fire.
- We put a washer on the prepared self-tapping screw and insert it from the inside of the propeller. Then we put three more washers on it;
- Take the remaining element from the bottle. Use a heated awl to make a hole in the lid and screw a self-tapping screw into it. In this way, the propeller is attached to the plastic bottle. There is no need to screw in the screw all the way. The plates must rotate freely;
- Attach the turntable
to the support. - Two holes are made in the neck and a small nail is inserted into them, which is then hammered into the handle.
The principle of operation of such a windmill is simple: gusts of wind, hitting the propeller, begin to spin it, and the largest element of the turntable
It also rotates around the nail. The washers create noise, which scares away small pests.
Method No. 2
This method requires fewer items to be used. You will need a stick, garden shears and a bottle:
- We make wide cuts in the walls of the plastic bottle from top to bottom;
- From these holes we make two more smaller ones perpendicular to the main one. One above, the other below;
- We bend the resulting elements to the sides, you should get blades;
- We put the resulting mechanism on the support after making a hole in the bottom of the bottle.
The wind rotates the blades, creating noise that scares away moles. Such devices are usually placed near an animal's burrow.
Advice! If you do end up catching a mammal, it is worth remembering that it can bite painfully. To protect yourself from an unpleasant surprise, you should wear thick gloves or mittens.
Method No. 3
To build a structure for repelling moles, you will need elements from the second method, as well as a plate cut from the wide part of another bottle:
- In a plastic bottle we will make slits 15 cm long;
- From the additional part it is necessary to cut the blades for the propeller of approximately the same length;
- The blades must be inserted into the holes to form a propeller;
- You need to make several holes in the lid and insert metal rods into them. Then attach the device to the stick.
When rotating, a rustling sound is produced, accompanied by vibration. Hearing it, the mammal gets scared and feels discomfort, so it moves to another habitat.
Method No. 4
You need to stick sticks along the perimeter of the land, placing several supports in one place. beer cans on them.
.
When there is a gust of wind, the plastic or metal will bang against each other, creating noise that prevents the approach of a harmful mammal.
Method No. 5
This is the so-called electronic mole repeller
. It is made from a hollow metal pipe. The scheme is like this:
- The pipe is dug into the ground and an inexpensive electronic beeping part from a battery-powered alarm clock is placed inside;
- At the top, the pipe is covered with cloth to prevent noise from reverberating throughout the surrounding area, and with a cut-off bottle to protect the structure from rain.
Option 2. Pinwheel
A wonderful children's toy that can serve as a decoration for the local area. It is cut from one plastic bottle, from which the bottom is first cut off, and then the entire side surface is cut into 3-7 strips. This is how the turntable blades are made. They must be folded perpendicular to the neck and processed over a candle flame to melt the sharp cuts. Slightly softened plastic can be easily turned at an angle of 45 degrees or the surface slightly bent to form fan blades. A hole is made in the lid with a nail, then it is necessary to enlarge it slightly, but so that the diameter of the hole does not exceed the size of the nail head. After this, a stick is dug in, and a nail is nailed to it, onto which a large flat bead, a pinwheel, and another bead have previously been placed. Instead of beads, you can use stronger flat metal washers. In this case, the product will rotate well and will not fly off the nail.
You can improve this option and place several of these turntables on one long bolt. Then the sequence is as follows: a washer, a pinwheel, a washer, a nut fixed in the middle, then again a washer, a second pinwheel, a washer and a plug for the bolt.
Biological characteristics of the pest
The common mole, like the hedgehog, belongs to the order of insectivores. Already from the name of the group it is clear that it cannot feed on potatoes and other underground parts of plants.
Weighing 130 g, the body length reaches 15 cm. It feeds exclusively on insects and for this, at a depth of 10-50 cm, it digs a system of underground passages with its powerful forelimbs. The nest is built at a depth of up to 2 meters. There, in a dug labyrinth, he finds food for himself: earthworms, insect larvae and other arthropods
.
On the picture
To compensate for poor eyesight, it has phenomenal hearing and sense of smell. Like all animals, they love silence, so when there is strong sound exposure, they leave the developed territory. People take advantage of this weakness of his. Plastic anti-mole turntables and other homemade repellers made from scrap materials are used.
Plastic pinwheel against moles
The simplest type of repeller. To make it, you will need an ordinary plastic bottle and a metal pipe or thick steel wire, onto which the mole spinner is actually placed. Several cuts are made in the bottle, which are folded back to form peculiar pocket blades. The wind causes the blades to spin, which creates noise that resonates into the pipe and goes into the ground.
Several of these tubes can be stuck near mole holes. In windy weather, a mole repeller made from a plastic bottle creates an unpleasant vibration through its rotation, which forces the animal to go in search of a quieter habitat.
This repellent method works on European, Small and Caucasian moles. Moles in the northern regions of Russia most often do not respond to windmills
. It is advisable to place several of these windmills at a distance of 10-15 meters from each other
.
Option 1. Simple weather vane
This product can be placed in the garden or local area just for decoration. However, it is also useful for schoolchildren, who are asked to keep a “weather diary” and determine the prevailing wind direction every day.
To make it, you will need a stick as a support, and a small piece of thick wire on which you will need to place the weather vane. The simplest option is to pierce a bottle with wire, bend a loop at the top, add a large plastic bead at the bottom, and fix the resulting structure in the center of the stick. Before installing the wire, you can paint the bottle in bright colors using acrylic paint. A cheaper option is to use multi-colored electrical tape, which you always have on hand at home.
How to make a pinwheel from beer cans?
The design includes a metal pipe and an empty cola or beer can. The top of the can is cut out to fit onto the pipe. The same 3 cuts are made on the jar. For greater noise, it is better to bend the bottom of the can. The choir performed by several noisemakers, the mole will not be able to stand it and will leave his favorite places.
Of course, making a repeller from a plastic bottle is as easy as shelling pears, but not everyone has such a desire. And there can be problems with the wind. In calm, windless weather, they will become a simple decoration of the garden plot. And the resonating noise in gusty winds may not please both the craftsmen themselves and their neighbors.
- We didn’t use any methods when fighting the mole. My husband dug up the entire garden. Moreover, the trenches turned out to be deep, almost as tall as a man. But every time the cunning animal turned out to be smarter than the man. The husband created drafts for him, waited for him to start closing them, and without waiting, he walked away for a minute. He comes, and the hole is closed and there is silence. Then the saga with the bottles began. They surrounded the pest like a wolf with red flags. When a storm warning was announced, such chatter began that the neighbors were the first to break down, and all this time the beast continued to surprise us with fresh mounds. We had to take our anti-mole noisemakers out of the bottles and apologize to the neighbors.
Yana, 36 years old
Alternative methods of getting rid of moles
In addition to homemade devices for expelling pests, there are also industrial options. For example, an ultrasonic repeller. The device looks like an ordinary stick with batteries inside. The device generates ultrasonic waves that are not perceived by the human auditory analyzer, but are annoying to pests.
One of the most successful solutions will be the Tornado-OZV 02 repeller
On the picture
The underground inhabitants begin to panic due to constant mechanical and ultrasonic vibrations.
- The sound source itself is located at a depth of 20 cm, which eliminates the noise effect above the ground.
- Soil is a denser medium, so sound waves propagate better in it and reach a radius of 2 km.
- The device is made of impact-resistant materials that are resistant to dust and moisture. The device operates for 3 months on one set of batteries.
- The price of the Tornado repeller is 1200 rubles.
— Moles took a fancy to our site last summer. The fighting season ended in favor of the miniature animal. A plastic bottle against moles did not help. The onset of spring was met fully armed. We bought a Tornado repeller on the recommendation of a friend who himself suffered from uninvited guests. For a plot of 12 acres we bought 3 pieces. They created the Bermuda Triangle. After 3 days, the vital activity of the animals ceased. But, judging by the reviews, Tornado does not help everyone. Maybe it's the properties of the soil. We were satisfied and advised everyone who found themselves in our situation to buy it.
Svetlana Mikhailovna, 57 years old
Electrical circuit and operating principle
The rodent (mole) repeller is assembled according to the electrical circuit diagram below and consists of only two simple logic chips, a transistor and several passive elements located on a printed circuit board. A distinctive feature of the proposed circuit is low power consumption (a set of three AA finger elements with a capacity of 1 A*h is enough for the entire season), which is due to the emission of an audio signal with a frequency of about 480 Hz for two seconds with a frequency of once every 32 seconds. In addition, this mode of operation of the repeller has a more effective effect on moles and increases the time it takes rodents to get used to the sound.
Structurally, the circuit consists of a clock generator assembled on elements DD1.1 and DD1.2 generating a frequency of about 480 Hz, a frequency divider on the DD2 chip, a logical signal adder on DD1.3, a key transistor VT1 and an audio emitter BA1.
The frequency of the rodent repeller clock generator is determined by the values of resistance R1 and capacitor C1. By decreasing or increasing the value of R1 or C1, you can accordingly increase or decrease the frequency of the emitted sound signal.
From the generator, a rectangular sound signal without changing frequency, through logic element DD1.3 and current-limiting resistor R4, is supplied to transistor VT1, turned on in key mode. In silent mode, a voltage close to zero is applied to the base of the transistor and the transistor is closed. In this mode, the current consumption of the rodent repeller is 0.1 mA. In the sound signal emission mode, the current increases to 22 mA. A simple calculation shows that when using batteries with a capacity of 1 Ah, the mole repeller will work for 9000 hours or 375 days.
The signal from the clock generator is also sent to the counting input (pin 10) of the frequency divider DD2. Based on a positive signal drop at pin 9 of the counter, logical zero changes to logical one. In order to ensure the emission of an audio signal with a period of 32 seconds, a logical unit is supplied from pins 15, 1, 2 and 3 through diodes to the 12 pin of logic element DD1.3, locking it. As soon as a logical zero appears simultaneously at pins 15, 1, 2 and 3 of DD2, DD1.3 will pass a signal from the clock generator to the base of transistor VT1 and BA1 will begin to emit sound.
The chain C2 and R2 is used to set the output voltages of the DD2 chip to zero. When supply voltage is applied to the circuit, capacitor C2 begins to charge and a supply voltage appears at its lower terminal, which is supplied to pin R of the microcircuit. When the charging process is completed, the voltage at its lower terminal will drop to zero and will no longer affect the operation of the DD2 chip. Resistor R3 is a load for diodes VD1-VD4, so that there is somewhere for the current to flow and to eliminate interference in the absence of voltage at pin 12 of the DD1.3 microcircuit. C3 serves to suppress interference that occurs during transient processes in microcircuits.
Chemistry against moles
If all of the above remedies do not help, all that remains is to resort to chemicals, but only to scare away the animals. One of them is “Ejector concentrate Doctor Klaus from moles.” Its composition:
- citronella (oil);
- castor oil (31.1%);
- water;
- functional components.
It is best to use the product at the first signs of the presence of pests. The ejector is easy to use. First, attach a hose to it, then turn on the water and treat the area inhabited by insectivores. For preventive purposes, treatment is carried out every 2-3 weeks.
On the picture
Only the soil should be sprayed, not the plants on it. If a molehill appears where the snow is melting, then the ground is simply watered with the mixture from the ejector for 1 minute. You can also drain the underground passage itself, but first remove the top layer of soil.
The cost of one bottle is about 700 rubles.
In the fight against the pest, some people make their own anti-mole pinwheels from plastic bottles, while others use innovative methods. The latter help preserve the harvest without much time and money. To ensure a guaranteed result, you should perform all actions according to the instructions and then victory will be yours.
Everyone likes the singing of birds, it is interesting to watch the snake in the circus and it is interesting to look at the mole in the picture. It would seem, what do moles, birds and reptiles have in common? First the bad: we don't like them all as uninvited guests. Those who read this do not need to explain why. Now about the good stuff: all these living creatures are afraid of noise!
Here I am: you probably weren’t expecting me?
Let's assume that they won't be able to reach an agreement among themselves and won't all attack at once. However, there are folk remedies that help get rid of all the listed pests indiscriminately in the garden.
We catch moles and remove them from the site
This stage is quite important, since there are cases when a gardener, after a long hunt, finally managed to get rid of one mole, he relaxed, thinking that the fight was over, and then was surprised to discover that the problem had not disappeared.
In general, on small plots of land - up to 20 acres - cases of simultaneous settlement of several adult moles are quite rare.
As a rule, several animals require a fairly large territory (about a hectare) for sufficient nutrition, in which they can lead a normal life without meeting each other.
In rare cases, a garden plot may be located at the junction of the territories of two moles, and they can “manage” here at the same time, spending most of their lives outside the garden.
The number of moles in a dacha is determined by the disconnection of molehills, that is, by the location of soil emissions on the site. Roughly, we can assume that such piles of earth, located along a clearly visible line and located at a distance of up to 20-30 meters from each other, were made by the same animal.
If two or more separate groups of such molehills are clearly visible on the site, separated by a considerable distance (more than 30 meters), then we can conclude that they were most likely made by different animals. This means that there are several moles here, and this will need to be taken into account in the future when getting rid of them.
So, let’s assume that you have roughly calculated how many moles live on your summer cottage, and roughly estimated their favorite places to move. Let's start getting rid of pests...
You can catch moles using either homemade traps or commercially available devices.
A “pipe” type trap is most often used as a mole trap, which is installed during the animal’s move: the mole crawls into it, pushing the door forward (the door only opens inward), after which the animal can no longer get out.
You can also make such mole traps with your own hands from ordinary plastic bottles or sections of plastic water pipes. Although it will be easier for someone to buy a ready-made product - the price of such traps in stores is approximately 600-1200 rubles.
Another way to catch a mole is to dig a bucket, pan or plastic bottle into the ground under its passage, into which the animal will fall when it passes through its tunnel.
It is advisable to check such traps every 5-6 hours. After catching the animal, you need to take it 1-1.5 km from the site and release it in the grass or bushes - this way you can get rid of the mole forever, since it will not be able to overcome such a distance and will not come back.
Here are some more popular and fairly simple ways to catch a mole in the country:
- Just dig it out with a shovel while moving near the surface. At this time, the ground rises a little, the animal is visible, and if you quickly stick a shovel behind it and throw out the lump, the mole will appear on the surface of the earth. The method is complex, it requires strength, speed and, most importantly, time to wait for the animal;
- Sometimes they get rid of moles using traps that kill the animal. These devices are as effective as live traps, but their use is inhumane. If the animal can be caught alive and taken out of the summer cottage without killing it, then it is better to prefer the humane option;
- Installation of fishing lines with fishing hooks in mole passages. Some even recommend hooking earthworms. This is a rather brutal method of catching moles, and it can hardly be recommended for use.
In some cases, with proper use of traps, it is possible to get rid of moles in a summer cottage in just 1-2 weeks. However, we note once again that the use of traps does not cancel the use of repellents, since only in this case the risk of new moles coming to the site will be minimal (in general, using repellers to drive away a mole living in its “native” territory can be more difficult than repelling the animals , coming from outside and only looking closely at potential hunting grounds).
What to do against uninvited guests?
Of course, progress has worked on this issue and offers a choice of ultrasonic repellers or chemicals. However, it is not a fact that these techniques will work in your case, but “the money was crying.”
Of course, you can record the sound of an eagle, the songs of cats in the spring, and play all this “music” for attackers. This is called a "bioacoustic installation". Note that this method is good to use in a nature reserve. In our case, it is completely unknown who will not stand it first: the moles, the neighbors or you.
So it makes sense to try to build a pest repeller for moles, snakes and birds with your own hands from auxiliary materials. If you can’t get rid of uninvited guests, then the money won’t be wasted.
Another "potential criminal"
The simplest skewer - DIY noise maker
The simplest thing is to make a pinwheel that, when rotated by the wind, creates noise. The vibration is transmitted to the ground through the stand and scares away the animals. Birds and reptiles also prefer to stay away from the unknown. It should be taken into account that “motley ribbons” indeed have a “quarrelsome” character and may be offended by an unwelcoming reception. For several days when dealing with snakes, it is better to wear secure shoes and trousers. Here is a master class on making a repeller from plastic bottles:
Another option is to make a ratchet to repel pests in your summer cottage from a beer can. As follows from the photo, the design is approximately the same.
The jar will emit sounds of a different frequency, which may be useful in conjunction with already made repellers. It is also useful to simply place several beer cans on metal pegs stuck in the ground. They will add new sounds to the overall “symphony”.
Beer can protects the interests of the garden
We almost forgot about “wind instruments”. To control pests on the site, it will be useful to bury several glass bottles halfway into the ground. The wind will definitely whistle in their necks, which the pests will definitely hear.
A monument to a good drink and a mole repeller in one bottle
Repeller efficiency
The mole is a blind animal. He sees nothing in the light that cannot be said about the darkness. Therefore, the mole’s hearing and sense of smell are very well developed. All homemade repellers are based on the formation of some kind of mechanical action and ultrasound.
- Extraneous sounds: rustling, rustling, creaking, knocking, whistling, rumble;
- Vibration, movement.
When a plastic object spins in the wind, it sends vibrations down the stick into the ground. When crawling to the location of the repeller, the animals sense these vibrations of the ground, as well as unpleasant sounds, and remove themselves.
Conclusion
It must be remembered that moles live in families, which consist of several adults and younger ones. Many families can unite. The animals dig holes and passages several meters deep.
Moreover, each underground path has several exits, which makes it difficult to determine the main location of the family.
All of the repellers we have listed have been tested repeatedly by users and are also low-cost and troublesome, so buying a modern mole repeller is not a bad thing, but complement its availability at the dacha with a homemade “brother” made from a plastic bottle.
A small pinwheel made from a plastic bottle can be a very useful item in your garden. With its help, you can scare away birds from ripening fruits or moles trying to dig up and down the entire garden and vegetable garden. Plus, it’s a lot of fun to make and color with your child, so choose any master class and get creative!
Materials and tools:
- plastic bottles of all shapes and sizes;
- scissors, stationery knife, candle;
- acrylic paints;
- metal rods, washers, screws/bolts, nuts, plugs.
B-52 strategic bomber against moles
It seems to me that anti-mole noisemakers for pest control in a summer cottage do not look very aesthetically pleasing and can be improved. At the same time, you can involve children in useful joint activities. Based on this, we put together a three-engine aircraft to repel pests.
B-52 bombs mole positions
To implement the idea, eight plastic bottles were required. The master class on making crafts is as follows:
Bomber - repeller of moles, birds and reptiles can be installed in the garden. We wish you a productive and interesting time. Let this specially selected video help you.